Showing posts with label onion rings. Show all posts

Monday, 17 August 2026

help please

Pin It now!

 The DAL 2026 challenge is progressing nicely with 13 participants already sending in their start and/or finished models and a commitment from two others. Some have made/are making multiple versions and/or multiple rounds!!! Some have designed for the first time, but looking at their models, you wouldn't ever guess that! It is so exciting and inspiring. 

Since my blog has been silent for a couple of weeks, here's a quick write-up where I need your help.

This is an onion ring motif I created using Anne Fairchild's Skylark Join which works well to join both chains as well as true rings to a picot that lies below the current work. It is an old join (the Lark's Head Join) with a new function or application.

So here's where I'd like your suggestions -
  1. Should I add another round around the rings?  My intention was to add a chain round that dips in to resemble petals. What do you think?
  2. What should I name this motif? I am drawing a complete blank there.


I have been enjoying some tatting time and have taken stepwise pics for several of the projects, including the join and motif above. Many are for 'new' techniques. Some day I hope to upload them all.

Hope to hear from you, after which I will prepare a proper post with pattern, links, etc. ....

Tuesday, 26 December 2023

lighting up

Pin It now!


The 2nd candle motif is complete, with pattern. As mentioned here (https://tipsaroundthehome.blogspot.com/2023/12/the-power-of-15.html) I used treble tatting stitch chains alternating with regular double stitch chains to block tat this textured candle. 

While I wasn't successful in obtaining the intended spiral effect, I have since found a solution and even tried out a very quick trial. I believe it should work. No pics yet.

E15 Candle Motif version 2 pattern pdf - https://drive.google.com/file/d/1r3SXvBp6bTwrHxU0Y6veyl2M5lnqA1uv/view

The flame is slightly different from version 1, both derived and adapted from a motif of pattern #15 from Endrucks' ‘Die Schiffchen-Spitzen’,1920.

The flame is tatted separately first. When we start the candle body, the first ring is joined to the final ring of the flame in onion ring style/join.

And the base or candle stand is also different. 

I'm not at all happy with my tatting, especially the stand. I need a change of glasses to see more clearly! And working under a magnifier limits the fun. Hmmm, come to think of it, I could easily have re-tatted the stand from scratch! Perhaps I will.

If you tat it, please do share your improved versions! May these candles brighten up the new year as well. Happy tatting! 

Thursday, 2 July 2020

what an intrusion

Pin It now!
A few weeks back, while tatting the doily, a simple mistaken intrusion brought on the realisation this could become a new picot method! Hence I'm calling it the Intruding Picot for now. Suggestions for a different name are welcome.

And as I thought over it, more and more applications arose, making this picot not just practical, but versatile. Some applications are not visibly elegant, while for others it seems tailor-made. A peek into my first trials .....

The topmost scroll shows a picot, including 3 graduated picots in 3rd, intruding in the ring space.
In the 2nd ring, a direct comparison can be made between normal picots and this slightly textural one.
On chains, I tried directional tatting with these new picots.

Tried it on onion rings. The sequence of tatting is altered - outer ring made first, with one intruding picot in the middle. Then the inner ring is worked and joined to that picot. The extra length works as a decorative picot.
I first came across this altered sequence by Ninetta (please see details in section 1.3 here). But there is no need for 2 picots with this unobtrusive intruding picot as you can see below ....

Next the outermost chain/mock ring was worked and joined to that Same single intruding picot!
Nifty, eh?! And pretty invisible, too.

And finally for the present - mock rings. No more holding the core thread with a paper clip! Make intruding picot, tat the 'ring' segment, and join to the picot. That's it!
Oh, no there's more... unlike the paper clip inward or core thread picot, we can actually alter the length of the picot. Notice the difference in the base of each mock ring - the variability in 'distance' is deliberate.
There is a slight twisting of chain segments near the picot - needs work and practice.

There are a couple more ideas I want to try out (one as a ring filler), but couldn't resist sneaking you a peek! So, what do you think? And can you guess how it's done? It is so simple, you'll be stumped!
Do you think it is worth sharing - will you be willing to try it/use it? Can you think of more applications? Waiting eagerly for your comments and suggestions .... please don't disappoint :-)))

Related Posts showing pictorial and effects - 

Wednesday, 1 July 2020

never say die

Pin It now!
Serious readers of my blog may recall my inexplicable difficulty in working Aurora's onion rings, despite the fact that I understood the concept and she had laid out a stepwise pictorial with instructions here. Yet based off that method, I easily accomplished Kathleen's variation as seen in this pictorial.  Judith left a couple of comments there today and I decided to give it one more try.

This time I did not follow Aurora's pdf. I went with her concept in my mind and Voila, I got it!!! Yup, never say never! So here is my take ... a quick comparison of 3 methods which includes Judith's suggestion that lies in between.

Specs :


From left to right :
  1. Kathleen's captured onion rings (Variation #1 of Aurora's onion rings method). The inner ring is captured within the base of the 1st half stitch of outer ring - within the leg of the half stitch.
  2. Judith's half-hitch capture (Variation #2 of Aurora's onion rings method). The inner ring is trapped between the 1st and 2nd half stitches - between core and working thread. 
  3. Aurora's onion rings (original method). The inner ring is trapped after making 1ds. Thus it is trapped between 2 stitches - between core and working threads.
  4. Kathleen's method repeated for sake of consistency.

My first thoughts :
  • I found it easier to maneuver and position the inner ring using Kathleen's method.
  • In Aurora's method (#3 OR) I worked only 5ds in the last segment since 1ds had been worked while trapping the inner ring at the start.
  • This also causes a slight offset or perhaps I need to practice more.
  • I can barely detect any difference in the bulk in either of the 3 methods, although I understand that technically Judith's comment is right. 
  • They are all fairly flat.
  • I think Judith's variation is visually best, though Kathleen's is easier to implement. 
  • Judith also mentioned posting the shuttle. I tried it, but didn't like the result, and pulled the thread back to 'normal'. To be sure, I post shuttle Only for backside rings - works for me.
  • More practice and application required, along with experimenting with 2 colours.

UPDATE : I forgot to add a slightly different type of "captured rings" - Floating Beads method used to capture the inner ring with the flexibility that it can lie flush against the outer ring, or can float at a slight distance. Here are a couple of pictures showing the diversity -
 
It is not as elegant as the above methods, obviously.
Dancing Peacocks medallion was adapted to become the center of my Design Round Robin doily. This is the center where Kathleen tatted the floating inner ring using her captured OR method instead of the FB method and I learned it from her.


Many thanks to all three tatter-designers ; 
love to have options and multiple paths toward improvement!

Saturday, 14 December 2019

Gotham Towers

Pin It now!
Snowflake #22 in Land of Laces’ 25 Snowflake Project

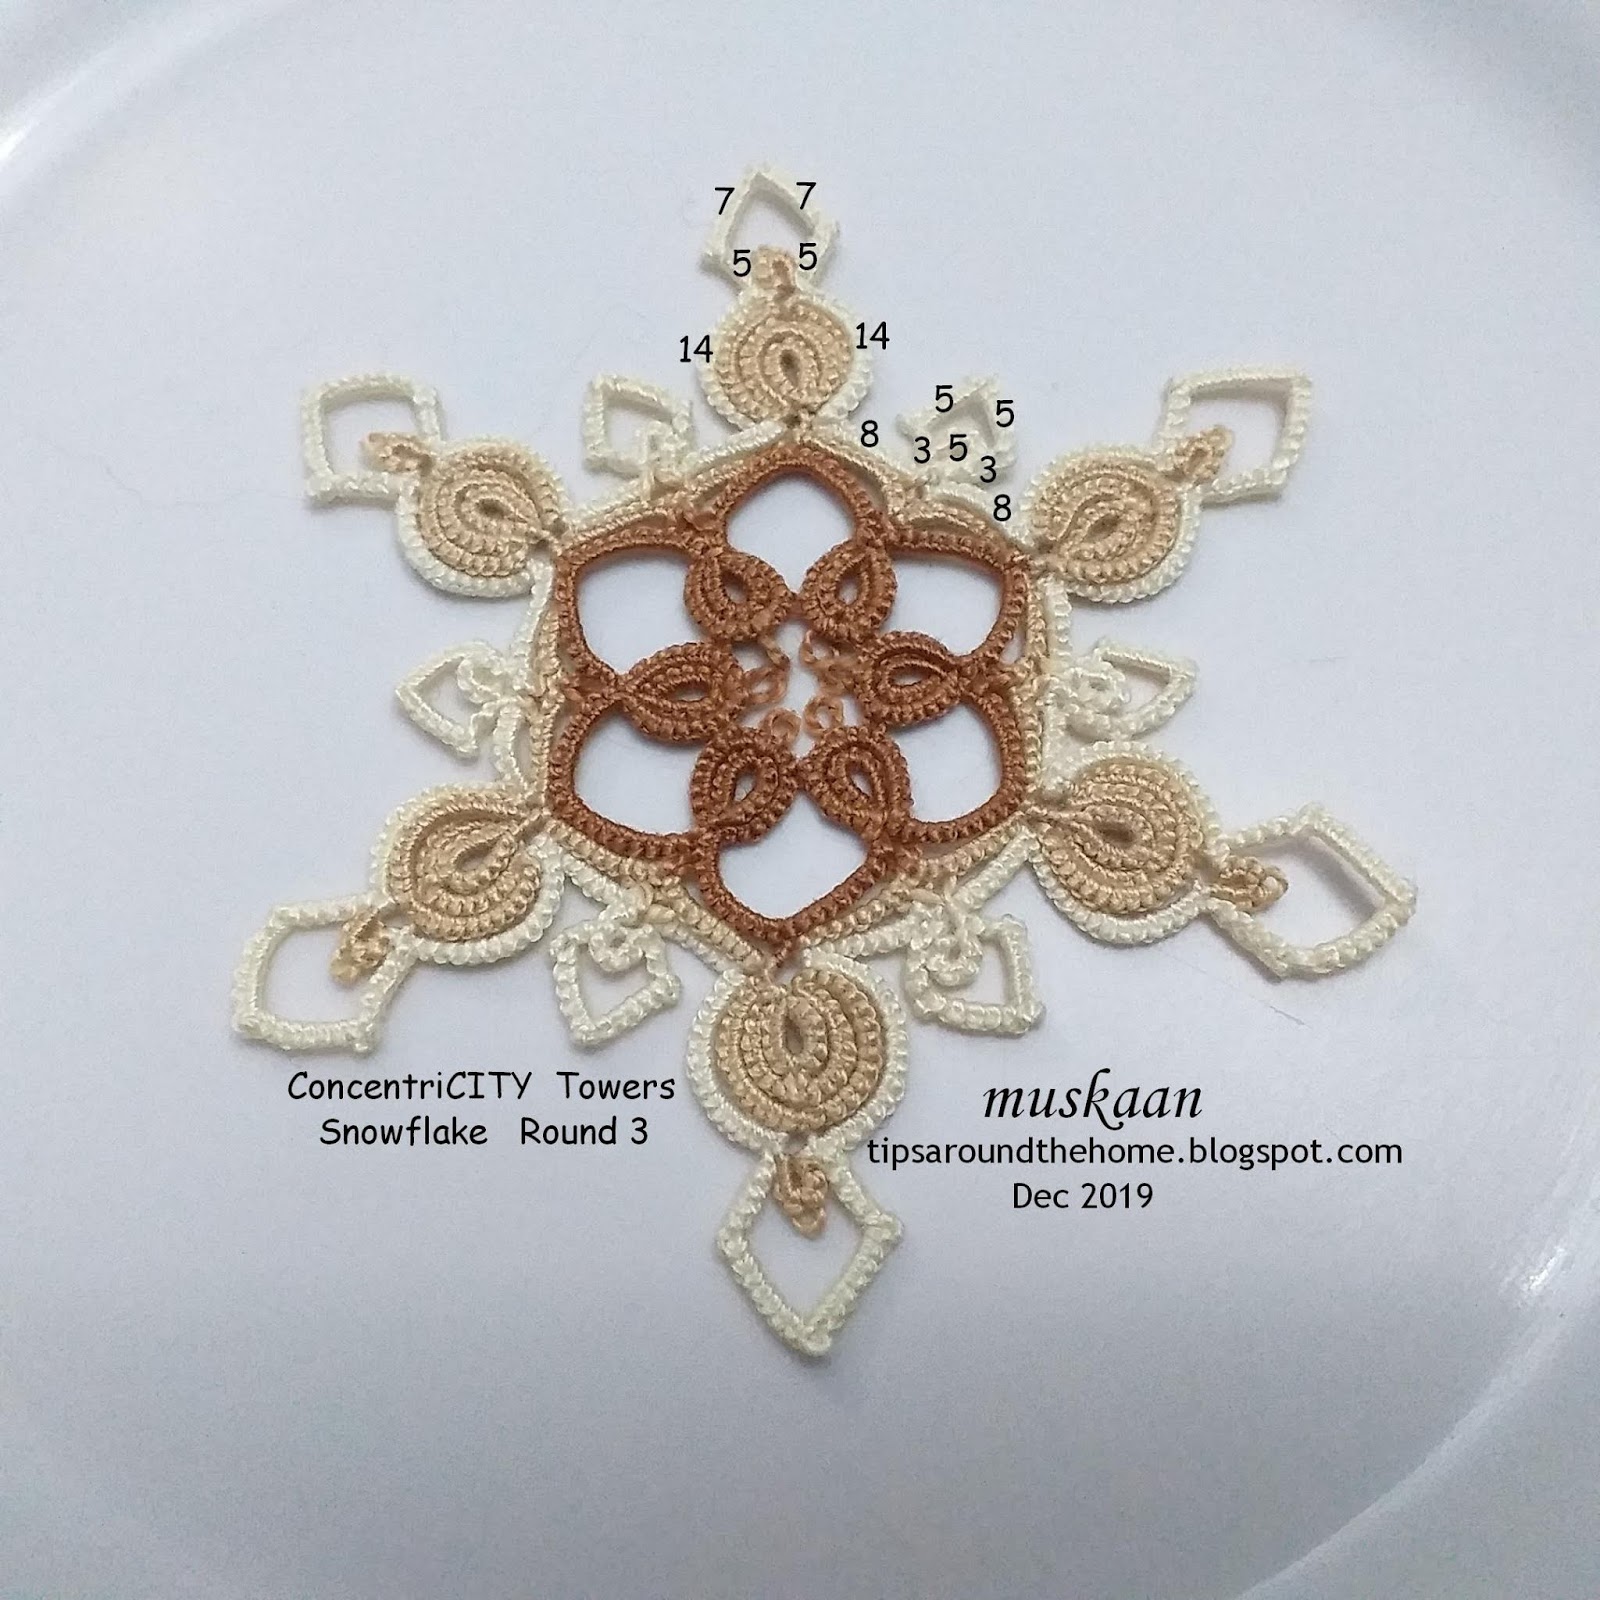
Taking in view the majority opinion in previous post, this is the 3rd round added to the snowflake. Since it has numerous possibilities (time is running out, & I am involved in helping out friends ;-P), I am counting it as #22, with 3 more to go. 

ConcentriCITY Towers snowflake
pattern
For some reason I was just not into this round – I hated my tatting, the curves in the chains were not sitting right, so many options kept invading my head, and I just slogged through somehow. I was almost on the verge of calling the 25 snowflake project over. After blocking it, though, I am fairly satisfied, and want to continue on.

Rounds 1 & 2 remain the same as shared here.
The only difference is the small ring at the tips is (3-3) instead of 5ds.

Since one tatter preferred written instructions, here is the entire written pattern. Choose your favourite method for making onion rings, pointed or angular chains, & joining 2 picots together. If required, adjust the stitch count so that the concentric rings & chains lay niched.

Abbreviation/Notation :
OR = onion ring ; -/p = picot ; + = join ; RW = reverse work ; Ch = chain ; -- = long picot ; 
SS = switch shuttle ; rs = reverse (unflipped) stitch - optional ; ^ = dot picot with Only 1 first half stitch (not 1ds) - optional ; 1SSCMR = self closing mock ring made of 1 stitch.

Round 1 : ball and shuttle, continuous thread
OR1: 6 – 6.
OR2: 7 – 3 +, p 3 – 7. RW
Ch :  2 –– 8 – 8 –– 2. RW
This forms motif#1. Repeat 5 more times, joining each new OR2 to that of previous motif, and also the last to the first.
Note : None of the chain picots is joined. They all remain free.

Round 2 : 2 shuttles, continuous thread. Refer pictorial here .
Attach thread to BOTH picots on adjacent chains of previous round. I joined them simultaneously, but you can choose your own method, keeping it consistent throughout. See Eliz Davis’ study. 
 
Ch : 2 –– 6 lock join
OR1: 6 – 6.
OR2: 9 + p 9.
Ch : 12 + SS mock picot R: 3 – 3. mock picot SS, 12, lock join
Ch : 6 – 2, lock join through Both picots.
This forms motif #1. Repeat 5 more times.

Round 3 - TOWERS : 2 shuttles, continuous thread.

Attach thread to the outside of any onion ring formation, and continue around the triple onion ring.
The ‘towers’ are made of curved chains where I used reverse or unflipped stitches. To avoid this, you can RW, and switch shuttle.
You can choose your favourite method to make the points. There are numerous options, including a seed bead, which I have listed at the end of the post.
To create the point at the top, I made 1ds SCMR, and the points at the side are made with 1 first half stitch dot picot. 
  
Ch : 14, lock join, 5rs, SS, ^ , SS, 7, 1SSCMR, 7, SS, ^ , RW 5, SS, lock join on other side of        OR ,
Ch : 8, lock join through Both picots,
Ring: 5.
Ch : 3rs, SS ^ , SS, 5, 1SSCMR, 5, SS, ^ , RW 3, SS, lock join on other side ring, and again          through both picots.
Ch : 8, lock join
This forms motif #1. Repeat 5 more times.
Block into shape.

NOTE : I found that when I made the ^ on the right side and continued with unflipped stitches, there was a tendency for that point to get sucked in. You may notice it on some of the spears. My solution : Make the ^. Then reverse work. Leave a loop of core thread as if you were tatting a SCMR. Work the 3 or 5 stitches, and only snug the chain. This keeps the point intact.
I really should’ve used another method to change the curves of the chain, and I did try a couple, but somehow settled for this finally. Not happy with my work.

In Anchor Pearl cotton size 8, this measures 4”. Side of hexagon is 2”.

FUTURE IDEAS
-         switch colours in onion rings, alternating the colours, as in block tatting.
-         use Victorian set for alternate onion rings.
-         change the tower curve from ‘spear’ to ‘trident’ (as in above trial pic)
-         padded double stitch (balanced ds) for sturdier spear chains
-         concentric chains for the towers (as in trial pic)
-         beads-          
-         Lee Buchanan gave me another idea to explore at leisure, to grow the tips as in real snowflakes.   
          

POINTED  CHAINS
A few options to make pointed chains : Scroll through for tutorial links (many are listed under different headings/sub-headings)   
-         Shoelace trick (SLT), switch shuttle or reverse work
-         Frivole’s one-stitch SCMR  
-         Jon Yusoff’s pointed chain 
-    Martha Ess’ folded chain (2 half-stitches) [node stitch - Elgiva Nicholls]
-         Usha Shah’s dot picot (or a half stitch dot picot as in pattern, to reduce 'bulk')
-         Ninetta Caruso’s right angle
-         Daniela Mendola’s mimosa knot


Monday, 9 December 2019

ConcentriCITY pattern

Pin It now!

Snowflake #21 in Land of Laces’ 25 Snowflake Project

This time I decided to go simple. Trouble with ‘simple’ is the constant fear that it’s already been done! Which is perhaps one of the reasons I did a 2nd round. A quick search did not throw up anything like this, and if there is, I haven’t seen or copied it.

I’ve used Kathleen Minniti’s captured adaptation of Aurora Lozada’s Onion Rings method. I find it ‘simpler’ and easier to remember, with great results. Kathleen captures the 1st/innermost ring in the first half stitch (within the loop after flipping the stitch) and proceeds with the 2nd half stitch. The rings stay snug.
In the 2nd round, where I worked the 2nd ring backside (RODS), I captured the inner ring in the 2nd half stitch (see pictorial below).

Both rounds are worked from front, clockwise....

ConcentriCITY snowflake
Small / Round 1 pattern
Worked in both Anchor Pearl (size 8, white) and Lizbeth (size 20), it is <4½ cms. As a hexagon, the side is 2cms.
Ball and shuttle, continuous thread. Start with the innermost ring (A) of onion ring. 
Choose your favourite method to make the onion rings.
I used Georgia Seitz’s Onion Ring or ball thread join.
Then work the chain. Note that the chain picots are NOT linked to each other. They remain free, and are slightly longer.

ConcentriCITY snowflake
Medium / Round 2 pattern
Worked in Anchor Pearl (size 8, white), it is 8 cms. As a hexagon, the side is 4cms.
2 shuttles, continuous thread.
Join to the 2 free picots on adjacent chains. I used a normal lock join, pulling up a loop simultaneously through both.
Check out this explorative study by Eliz Davis of how different ways of joining 2 picots together can be visually different. She tried Consecutive vs Simultaneous Joins. 

Start with the chain, going clockwise.
Lock join to the center picot. Make the 2 inner onion rings. Outer one is a chain, with a thrown ring. Join chain to middle ring, leave some picot space and make thrown ring. Leave equal space after closing ring, and continue chain. Lock join to same picot and continue chain, again making a join to the double picots simultaneously.

Repeat all around.

NOTE: I often have to tweak the stitches - adding half or full stitch in onion rings. Hence, depending on your tension, make the necessary adjustments.

PICTORIAL (with FRONTSIDE/BACKSIDE TATTING) 

The following pictorial shows how I worked one repeat, in directional or frontside/backside tatting. Red is shuttle1 & yellow is shuttle2.
1. After making the chain, make innermost ring with Sh1.

 2. Turn work and start next ring backside. Capturing the inner ring in 2nd half stitch.

 3. Close ring. Both shuttles are now in position to start chain.

 4. Make chain around the onion rings. Make onion ring join or lock join. Switch shuttle to tat a thrown ring, leaving mock picot space. Switch shuttle, and continue chain back on other side. Lock join to base. [see inset].   
 5. Make chain. Put hook through both picots of previous round to pull up a loop and make a lock join.
 6. Continue chain
 7. Make lock join and repeat from 1.
8. Snowflake complete.

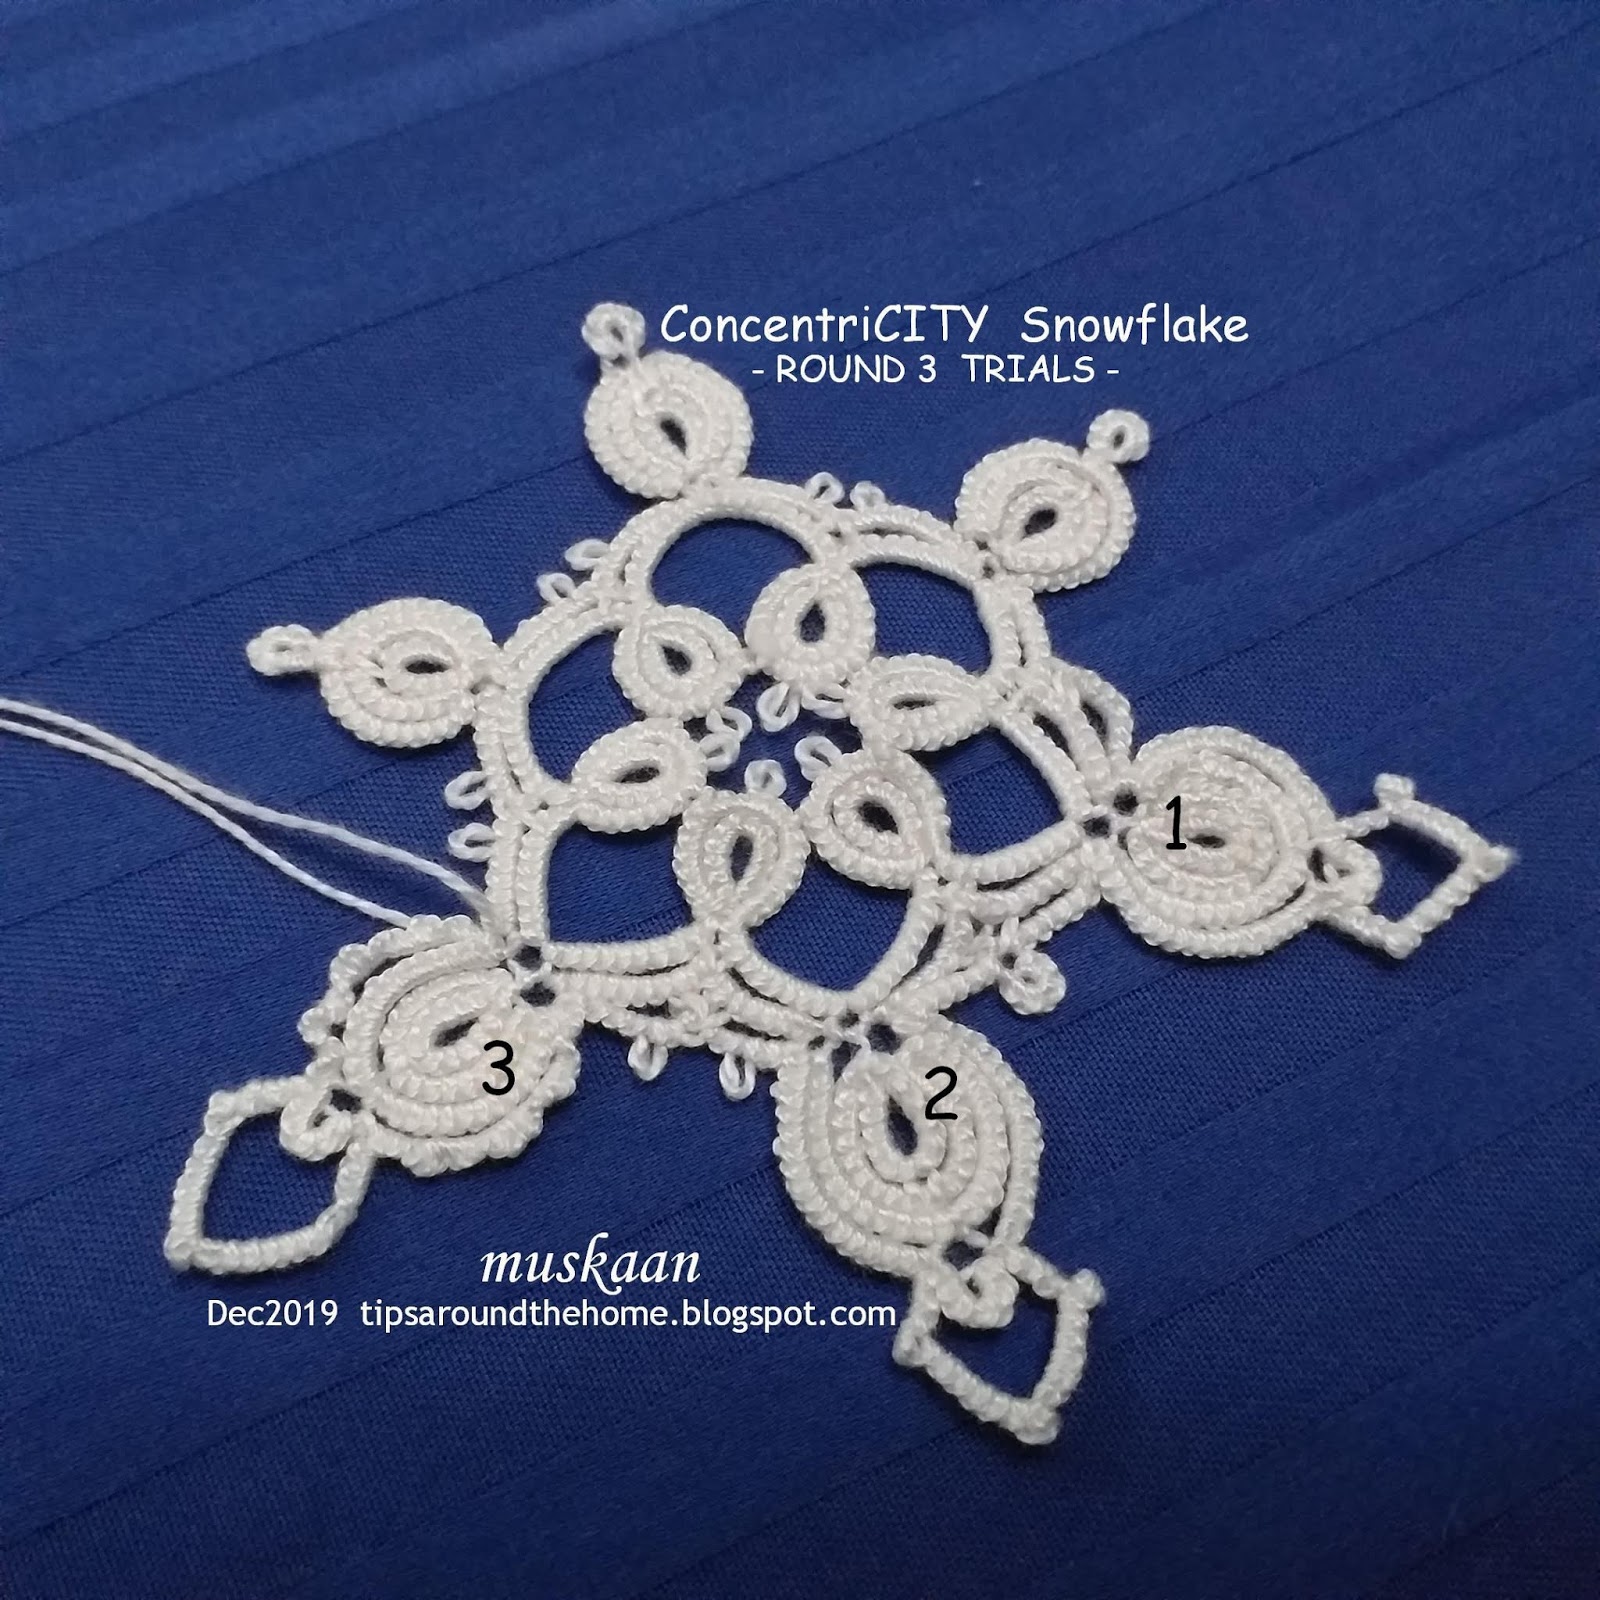
 Round 3 TRIALS
I tried a 3rd round. These are the 3 repeats with tweaks in each (from 1 to 3). I couldn’t decide whether to go through with it or not, but feedback on facebook seems to be in favour of making a 3rd round.
I have a couple of questions, though –
  • Should there be a small ring (as in 1 & 2) or 2 picots (as in 2 & 3) between chains?
  • Should the outermost onion ring round be normal (1 & 2) or Victorian Set (as in 3)?
  • Anything else?
This will require making the entire snowflake afresh to make the picots the right size and avoid stretching. Hence it will be counted as a new snowflake for the project – I have 4 more to design/tat before the 25th, so I’m taking this lifeline ;-P


Friday, 3 May 2019

golden arches

Pin It now!
For the last several weeks I would see this Italian Tatting event announcement almost every time I logged in to facebook. (Lenore’s awareness ribbon is another part of it). Here, a vintage pattern was shared by Edda Gustalla and the only ‘rule’ was to keep the basic shape recognisable. She aptly calls it “A thread that unites”!

And I finally succumbed just for kicks. No, I am not entering it in the competition – horrors, it is hardly competition material! But it was a fun journey albeit slow due to all those beads!

Golden Arches Necklace
adaptation of Edda Gustalla’s vintage edging
‘a thread that unites’

1st  arch : a 2-repeat trial run with size 40 thread, no beads. (forgot to take a pic)

2nd arch : Red Rose size 20 metallic thread with beads. Trying to decide the colour of teardrops, etc. I used this method to make the onion rings in order to keep track of beads in each shuttle.

3rd arch : A bit of stitch count tweak, and using red teardrops with the larger garnet, all of which were attached using Floating Beads method.

4th arch : Finishing up. Sewed on gold beads to cover the open space under clovers. Added a ‘reflection’ above the teardrops, too.
Then strung more seed beads to make the chains on either side and add findings.
After this, I made 2 more short chains to complement the arch above and give the pendant a fuller look. However, these arches curve contrary to what I had in mind L 
Interestingly, the double-beaded chains took much longer to tat, having to pull out a bead from both shuttle and chain threads after each stitch. It was stop and go stop and go. Is there an easier way to do them?

I have written down the pattern (for my own notes) but will share only if somebody is truly interested. Pattern writing takes up way too much time and effort and currently I am employed in updating and reorganising the Tatting Resources page – another huge task.

So what would you change in this pendant/necklace to improve it?

Friday, 29 June 2018

Mock Rings 2 LJ mock onion rings

Pin It now!
Continuing from the last post … I’d like to point out that the categorisation I have adopted is not watertight. This is the closest I could get to organising the various types/styles of mock rings in an orderly fashion, choosing one main feature for grouping so that it becomes easy to remember and recall. Along with the similarity it highlights the slight variations.

Lock Join - Mock Onion Rings 

In previous segment the chain was converted into a ring by joining to picot(s) on a previous row. Now we move closer home with the join coming at the ‘base of the ring’. Here the ‘base of a ring’ refers to the bare thread between rings in a previous row or to a previous element.
When the chain is very close to the ring edge, it creates the impression of an onion ring. 

Traditionally an onion ring is made of usually 2 true rings encircling the previous one in flat layers - all starting and ending at a common point. However, if the layer(s) is worked as a chain, it becomes a mock onion ring.

2C. Lock Join: to bare thread between rings in previous row

In this variation, the join is made to bare thread between rings in a previous round. These chains give an effect of another ring encircling the earlier ring – a ‘rudimentary' mock onion ring.
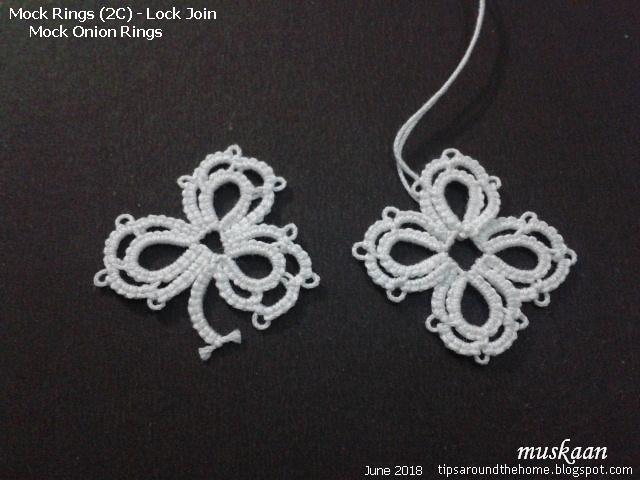
The Shamrock Leaf in above collage is made in 2 continuous rounds. The medallion of 3 free rings is made first, leaving a bit of bare thread space between each. These are true rings.
An outer chain round is then added. Each chain is lock joined to the bare thread between rings, giving the impression of onion rings.

[ Reference for section 2C is from the Craftree thread: Are these very old onion rings?. It refers to a pattern on p.28 of The Ladies’ Worktable (1871, March 4). ]


2D. Lock Join: to bare thread/base of previous element 


In onion rings, with each additional layer, the size of ring increases and a large ring is difficult to close. So, instead of true rings, the outer layers are worked as chains in both needle and shuttle tatting. Each chain layer is lock joined to the space at the beginning of that layer. It now resembles a ring.
In the above collage, the 2 inner cream rings are true rings followed by a chain using ball thread. After encircling the rings, the chain is lock joined to the tiny space between two layers. We can continue to add more layers in similar manner.
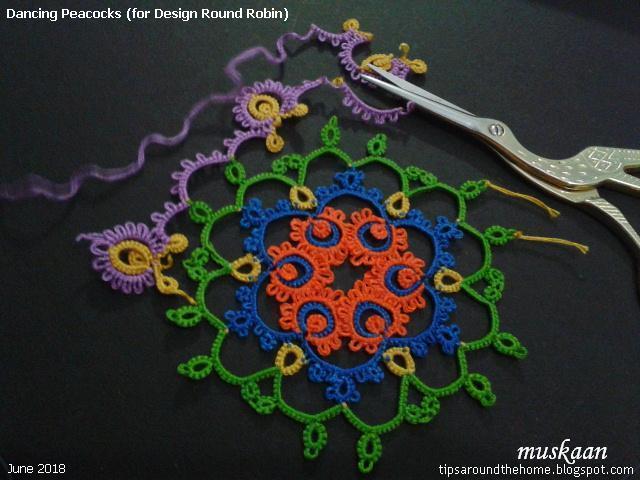
In the Dancing Peacocks medallions, only the innermost ring is true. Switching between 2 shuttles with different threads provided alternating colours.

In the lead pic, the mock onion ring on the left is made with twin true rings, followed by 2 mock ring layers or chains joined back around. 

[ For more details on onion rings and mock onion rings - Types of Rings by Judith Connors
(free sign in to Craftree to access document) ]

This concludes Category 2 - Mock rings made with lock join. Even though lock join is an essential feature of the next set of mock rings, the 3rd category will focus on linking to a picot at the start/base of the chain itself. 

....to be continued

Related Posts

Sunday, 24 June 2018

rotten core

Pin It now!
… or rotten pulp ?!


I've been spending the last couple of weeks bringing my four Design Round Robin doilies up to date. They had been neglected for the last couple of months, but now I am finally at par. I will share them in more detail gradually.
This post is merely about one rotten evening.

I was tatting the 3rd round on my Dancing Peacocks doily. Half way through I realised I’d been attaching it on the wrong side ! Much as I love fs/bs tatting, herein lies the disadvantage.
Not only can you see the colour blips in previous rounds (in pic below), but also how the stitches in the last round look more like rolled tatting with misplaced picots (purple in above pic) – a visual reminder that there is a distinct front and back side to tatted lace in directional and colour tatting.

About to snip off both threads, I remembered Jane McLellan's excellent pictorial directing us to snip rings and not chains.  I had stopped doing this ever since Carollyn's whip stitch method entered my tatting life, taking away all fear of hiding ends.

Fortunately, this round is mostly chains with stitches coming from the purple; tailor-made for the above technique. So off went the scissors on the mustard core thread and in no time I had rescued all the purple. Instead of cutting across the rings, I snipped through the core at the base of the ring.
For some of the stubborn points, especially near the lock joins, I inserted a fine crochet hook to make enough space for the scissor tip.

The unravelled thread is still wavy and vulnerable as seen above (these are 3 strands of Anchor embroidery thread). So I added another step -
I started winding this unraveled end on a new bobbin, giving it time to rest and recover. With the unused part of purple thread now at the free end, I started the round again with this ‘fresh’ thread. 
Turns out, I didn’t even reach the unravelled part in the corrected round - in a future post.

I lost my tatting and time, but did learn Aurora's method of capturing the inner ring in onion rings. Kathleen, who designed this round, used it and I followed accordingly. Aurora had shared it in the online class but I hadn't tried it out.
So not all was lost - new method learned, and pulp saved !!!  

Ahem..... the rotten core and pulp have twisted my arm to include their comment :
"Stop blaming the threads -- the fault lies in this tatter's scattered attention !"

happy tatting always ...
let's make sure our fruit and lace stay healthy :-)))