Showing posts with label Valentine's Day. Show all posts

Saturday, 14 February 2026

a new heart pattern

Pin It now!

This year our Endrucks FB group has probably felt a bit orphaned with both Ninetta and I being engaged elsewhere. We miss the interaction and games, but just cannot carve out enough time at present. So it was such a wonderful surprise to see a new heart derived from Endrucks' pattern E13 by Lella Loops! She is an excellent needle tatter and has been a participant in almost all our games and more. She sent us the diagram and I prepared the rest of the presentation for shuttle tatting.

E13 Cuore Mio (My Heart) by Lella Loops, Feb 2026 for #Endrucks1920Project ... click to download pattern PDF - https://drive.google.com/file/d/1hs_J5JF1kOf7j8RE-4xqZGK4y7fcQHFw/view  derived from Eleonore Endrucks' E13 pattern from 'Die Schiffchen-Spitzen', 1920.

It is a very clever construction ... Lella 'erased' parts of the lace and brought together two motifs to create this heart, with minimal changes to the stitch count, etc.! 

I quickly tatted up my own model with shuttle and though I am not overly happy with my work, it will have to do for now. Worked in Anchor size 20 (equivalent to Lizbeth 10), it is 2" across and a bit more than 1-1/4" high. 

It is a very easy pattern with the count being 6 or a multiple of 6 for each element and all rings are worked from the front in case of directional tatting. 

The drop or inward picot is made using the node or set stitch - 2fhs, p, 2shs.

Not only does it tat up quickly and can be used to empty shuttles (it needs very little thread on 2nd shuttle) but I also love the way the two long side chains on the lower side have that little curve before tapering down. Now if only I had noticed the uneven closure of the large ring it wouldn't have tilted to the right, LOL!

Please use the hashtag (#Endrucks1920Project) and the name of the designer & pattern when you post online. Not only is it a courteous gesture to give credit, but also makes it easier for others to find the pattern. , ......

I know it is too late for today, but hey we don't need a single day or a reason to tat hearts to our heart's content, right?! Do here are some more free heart patterns - Hearts from Endrucks directory -https://docs.google.com/document/d/1MpYw9XMB8Asz8zusj1ZpHvX8A8Ww424-rEVORtxcL1w/view  and my own heart patterns -https://docs.google.com/document/d/1LpHU69wNsQspIHgvt9pihgTNhHFDRBab3I5_MDEYyNw/view  (hmm, looks like need to update it!)

💗 Many many thanks to Lella Loops for her lovely heart and all her contributions!  💗

Friday, 23 January 2026

something new

Pin It now!

 For the last several weeks, starting around mid-December, I've been mainly focused on completing the Glossary for the book 'Six T's of Shuttle Tatting' by Net Best. Long back I had divided the glossary into separate letter files for ease of work and have gone through anywhere between 5 to 10 drafts of each over the years. Angela has been a patient and efficient support. This time it is 'final' ... my humble request to the tatting community is "Please stop bringing out new effects and techniques for this year so that I won't need to include it in the glossary ;-P Take a pause, my talented community!" 😁

So anyway, I've been tatting samplers for the glossary which were missing or for new entries. This, and the fact that I need a refresher on a few 'rarely' used techniques, I took up Natalie Rogers' Picot Bingo 2026 challenge again this year after skipping it last year. But instead of a completed project I might only make small samplers - to keep it short and quick. Some of these will actually dovetail with the glossary samplers, thus reducing any distraction or time constraint.

Learnt something 'new' - Stacked Dimpled Split Rings by Sandra Eichelberger (Crazy Mom Tats). It is a very clever application of techniques towards continuous tatting which she shared here - https://psychotatter.blogspot.com/2012/07/how-to-tat-stacked-dimpled-split-ring.html

NOTE: 'Stacked' is used for tatted elements that overlap and/or lay one above the other as a 3D formation. Hence in the present technique, 'stacked' is a bit of a misnomer and is probably used to indicate continuous tatting in a line or row of rings. (Thanks, Mary Arnold)

I used her stitch count. It is like working a split ring backwards where the 1st side is worked after working the 2nd side and the 1st side lies on the right instead of the left. Reminds me of Teri Dusenbury's SQDR (where she started with 1ds and then the entire ring was worked with reverse stitches) or a Reverse Ring, applied here to a dimpled yorkie split down the center.

It was a bit of a challenge to figure out the process but once I got it, it went smoothly. I think a pictorial or a video would help a great deal.
TIP: The main thing to keep in mind is to make the mock picot long enough. Notice how the dimple in the 2nd heart from top is less pronounced? The fault lies in a short mock or false picot.

Tied in a quick tassel made from the first scrap threads I could get my hands on. So one more tatted bookmark in my stash, though the body could've been longer.
The boxes crossed out in the Picot Bingo 2026 game (Level 2) -
  • Dimpled Ring - I'm sure these count even if they are split.
  • Tat a Rings Only Pattern - why do we limit ourselves to vintage rings only style patterns, LOL?
  • Tat a Heart - five hearts here.
  • Mock Picots - gravely important in this pattern/technique!
Two different levels of cards are shared by Natalie although I believe the above project falls in a bit of a higher category than even Level 2 (wink, wink). Check out the details and downloads here - https://www.patreon.com/posts/happy-new-year-147124370, 

UPDATE: (31 Jan 2026) Jane McLellan had worked on this technique to create a bookmark and a beaded bracelet here - https://janemactats.blogspot.com/search?q=stacked+dimple+rings
Many thanks to Sandra and Natalie !!! Keep it interesting and challenging! Great opportunities for new learning and consolidation of past learning.

Friday, 14 February 2025

Vee bit late

Pin It now!

This little flower was tatted several days back and I was going to  post the pattern along with a pictorial for overlapping split rings. But that's going to take a couple more days to write the post and ink the pics. So this prototype pattern is for you to play with on Valentine's Day. A little late, but flowers are the flavour year round! 

Tatted in Anchor size 20 (similar to Lizbeth 10), the flower itself is only about 1.5cms high and 2cms wide. The rest is stem with leaves.

The idea came to me while preparing a pictorial for Barbara's overlapping split rings. These form the petals, joining each petal to the previous one and the last to the first. It is a simple picot join just like when you do stacked rings in ANKARS keeping one ring above the other.
If you don't want to knot the two threads at the start, these resources might be handy - 

Little 3D Flower
a prototype pattern by Muskaan © Feb2025

Abbreviations: SR=split ring ; vsp=very small picot; fhs=1st half-stitch; -=picot; shs=2nd half-stitch.

Start with two colours wound in two shuttles. Shuttle 1 - petal colour; Shuttle 2 - green colour.
With shuttle 1 in hand or as the active shuttle, start the first split ring ... (refer image above)

SR1: 9 vsp 3, 4fhs - 4shs, 3 vsp 9 / vsp 3.
SR2: 9 +(to SR1) 3, 4fhs - 4shs, 3 - 9 / 3.
Repeat SR2 two more times.
SR5: 9 +(to SR4) 3, 4fhs - 4shs, 3 +(to SR1) 10 / 3.

NOTE: I made 5 petals (5th not seen in above WIP image) but in the 5th one, I increased the stitch from 9 to 10 in latter half so that it overlapped better. Adjust to ensure the overlap remains consistent. Join 5th petal to the 1st one, arranging the overlap consistently.

FYI: (4fhs, p, 4shs) is the node stitch which creates a dimple in the ring.

Do not cut threads, continue for stem. You can string or join a bead to the center of the flower using any one the threads. 

Stem is a Josephine or spiral chain. Use whichever half-stitch you wish.
NOTE: For leaves I used the Petal Ring by Maimai Kaito (2016) Instagram, YouTube, following Lesson #178 by Karen Cabrera Unfortunately it was difficult to photograph the curvature and sharp tip of the leaf though it is visible in some pics.
Choose your own stitch count for the leaves. The upper leaf is slightly smaller than the lower one.
Continue the stem for desired length.

I see a lot of scope for improvement but that, too, will have to wait for another day. Feel free to tweak and improve and show me what you come up with! I went with tinted pink for a rose or cherry blossom. Which colour and flower would you choose to tat with?

Related Posts -

Friday, 16 February 2024

east to west heart!

Pin It now!

My Budding Heart pattern was published in the Feb 2024 issue of 'Talking Tatting' (No.58.3 quarterly newsletter of Queensland Tatters, Australia), courtesy of Judith Connors. I think this is perhaps the third or fourth pattern she has chosen for publication and it is such a huge yet humbling endorsement.

💗💗

Several versions have been tatted which I sometimes come across on different platforms, but to remind you of one very special version from Krystyna Mura (Poland) - https://tipsaroundthehome.blogspot.com/2021/02/palentine-day.html

💗💗

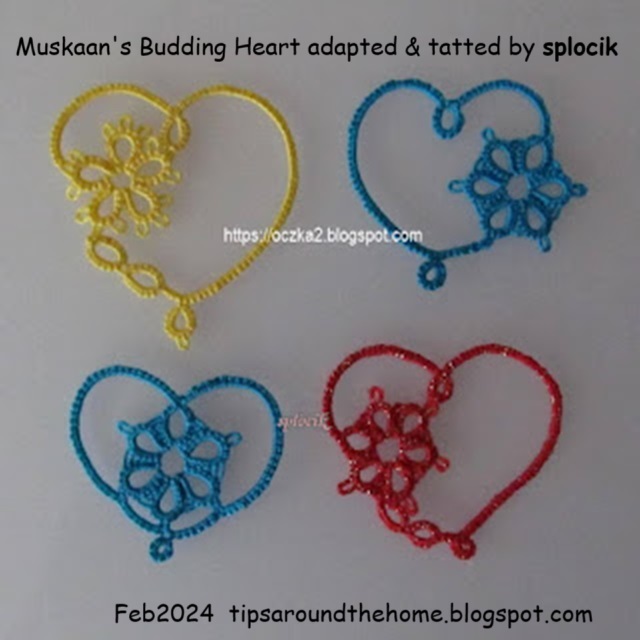
And most recently, is splocik's (Poland) play with the pattern - not one but four! Such cute versions and I love how she attached the dimple to the flower, thus anchoring the long outline. She shares her thoughts and process here - https://oczka2.blogspot.com/2024/02/zainspirowao-mnie-serduszko-frywolitkowe.html

💗💗

If you remember, this heart is part of the Buddy Hearts (2020) collection of 5 patterns, three of which were shared by Anita Barry(USA)! https://tipsaroundthehome.blogspot.com/2019/02/buddy-hearts.html. This set has been taught in the Online Tatting Class (Feb 2019) and published in the IOLI Bulletin (Summer 2020). Good to see the widespread reach of these little motifs.

You can download all 5 here (long version) - https://drive.google.com/file/d/1frJpMRiHu5fOEH9Zs3VANVGIURZA126_/view   and (short diagram-only version) - https://drive.google.com/file/d/1DZFxEDvEwe-rPUv1evgPaxic1sbaEnHC/view 

💗💗

I had a mind to tat a new heart pattern but couldn't manage my time and other commitments. However, it is definitely on my trial list and should be shared well before the next season of hearts.  

💗💗

💗Many many thanks to Judith, splocik, and of course, Anita and Krystyna!💗

Tuesday, 9 January 2024

what a heart

Pin It now!

Hearts are great motifs to learn and apply new techniques, practice and hone skills, embellish, and create new designs! Look at where this tiny little heart has travelled so far .... without forgetting it's origins!

It all started with Endrucks' pattern #3 (1920), an edging which was reworked and presented by Anita Barry (2020), which inspired AlenAlea Rako to turn it into squares (2021), from which I espied a heart (2022) and Sue Bradham saw a butterfly (2022).

A few months later, when we chose this heart pattern for one of our games (Pretty Me Endrucks Aug2022), more adaptations came about! These include a key chain by Marina MadJar tatting, an enlarged heart motif and one-pass bookmark by Margaret Davies, a coaster by Ninetta Caruso, and a butterfly by Stephaine Mc (Tattimic). Pattern links here - https://tipsaroundthehome.blogspot.com/2022/09/aug-roundup-1.html

During our game and later, several arrangements were shared including 3-in-1 Earrings, Collar, Bookmark, and other ideas. https://tipsaroundthehome.blogspot.com/2022/09/playful-hearts.html. 


This heart continued to inspire and Ninetta, through her coaster, designed the Tat Me Snowflake (2 versions) in Nov - https://drive.google.com/file/d/1ZENvdgxihM0YI3Ar_UxP9lqRwprmFotP/view  

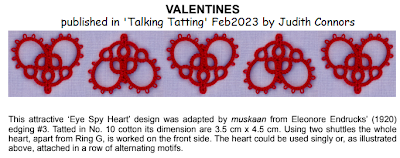
2023 started with the pattern being tatted and published by Judith Connors in their Talking Tatting, Feb2023 newsletter. She kindly permitted us to share her complete article  - https://drive.google.com/file/d/1aJ34xgaE67A0aI8LTj2xYpvx-NQLrBx1/view 

Later in June, Michelle Forclaz made additions to the hearts to make the Inside Out Flowers. https://drive.google.com/file/d/13L0NCvkqJM94Bnbnbf4ogVUzhhYjuaSN/view  The pdf also shows a few other adaptations she tried such as a little teddy bear, fox head, and butterfly.

Meanwhile tatters have often picked up the pattern and shared their versions, many with beads, and applications. And 2 new patterns emerged in December.

E3 Heart Butterfly by Jiamrat Supapol https://drive.google.com/file/d/19DWVrfGhrbb-l80icUsFiq4msQhmJTjl/view

and the E3 Heart Square Motif by Reiko Akamatsu where she adapted the E42 doily center to fit snugly inside the square. https://drive.google.com/file/d/1YxBre5DlW3RcW3ZJFY7-VrDnzvWeuN6m/view


For more heart derivatives, check the Hearts Directory - https://docs.google.com/document/d/1MpYw9XMB8Asz8zusj1ZpHvX8A8Ww424-rEVORtxcL1w/view
For more E3 pattern derivatives, check out the other Directories as well. We now have a composite doc listing all directory links (making it easier to reference, etc.). Endrucks Directories  - https://docs.google.com/document/d/1w1TZBg-HIzseGEUoJ-rko7tNbtSgZY5A18Oy2Y9Hh0Y/view

Please note that in this post, I have included pics of only the 'new' models that haven't been shared here so far. 

Hearty thanks to each and every Endrucksian mentioned here! Hope you continue your exploration and experimentation, sharing the beautiful results.

Thursday, 18 February 2021

Palentine Day

Pin It now!

Came across this for the first time on the 14th 'Palentine Day'. Well, it doesn't have the same ring as Valentine Day, but it certainly has a far greatly reach!!! And it does not have to be limited to a single day - pals brighten our day anytime and every time. And this year, it was extra special as you can see ...

The very talented Krystyna Mura tagged me on her take of the Budding Heart! Don't you just love her vision and impeccable execution?!
Every time I write 'execution' I think what an odd word to use 'coz it evokes more gory images!
She used much thicker pink threads for the heart outline, encapsulating the finer green threads for the foliage. 
Last year she gifted me with her variation of the Blossoms Heart! A dear pal in deed, indeed 💖

Many of my readers must already have seen the pleasant surprise from another dear friend, Ninetta Caruso, who organised a tatting event on the facebook group Chiachhierino: Filo, Amore e Fantasia. They chose my Block Heart (Spring in my Heart) alongside her own very pretty Heart by the Sea to share and tat along with the participants. This online event called Un cuore per te goes on from 14th through to the 28th of this month. So join in! You can find links to both patterns and more details here - https://ninettacaruso.blogspot.com/2021/02/hearts-friends-and-flower.html. Love the pictorial she created, too.

Lovely models of these hearts are coming in everyday from our enthusiastic tatters and talented Italian tatters! More of Ninetta's than mine, but that's to be expected - she is such an exceptional designer!😁 

Also coming into my inbox are the Happy Hands Heart I shared last time. Denise W is so taken in by the little heart that she has tatted several already, trying to learn new techniques and perfect them. Can't wait to share them with you.
What I Can share, however, is HisKid's (Sue) beautiful model in a happy colourway here. It is her first time at roll tatting, but it already seems perfect!


On the 14th, Anita Barry waltzed in with news that she had completed the TAL doily, yay! We should've known that Cupid was her tatting angel 😄 I have all the material, but need some time to put it together into a post. But for those who can, check out her or my facebook timeline for pics of her completed work - love the colour composition!!!


Find all my heart patterns here (which I will update with these recent additions)
https://docs.google.com/document/u/0/d/1LpHU69wNsQspIHgvt9pihgTNhHFDRBab3I5_MDEYyNw/

Before I sign off, here's a Delightful article by Karen Bovard Sayre who nails our thread addiction through studies! Anitra Stone called it Threadus hoardicus, and sadly we tatters seem to suffer from it, with no cure in sight 🤣😁🤪

Thank you pals, you make my life WonderFull ! 💖

Saturday, 13 February 2021

happy hands heart

Pin It now!
Happy Hands Heart
- free pattern by muskaan © Feb 2021

Almost down to the wire, but then hearts are in style throughout the year, especially if they bring happiness, happy hands and hearts with some chocolate thrown in!! And it's a fairly quick tat with not much thread required. So jump right in 💖

Based on the trials here, I worked another (top) last evening and then one more (below) which I am counting as the final pattern. Wish I could've tatted it more neatly, but it will still remain unforgettable since the earth literally shook while I was tatting! Earthquake tremors.

Design TIP: I used roll tatting instead of normal chains or lock chains for the lower segments because roll tatting is the narrowest 2-thread tatted line possible, right? 

There are numerous ways one can tat this tiny heart. I am sharing only one path and method. Feel free to adapt to your imagination (and skill level) but please share your version! Depending on individual tatting tension, you might have to tat one less or more half-stitch for the flushed chains.

Materials: 
Best worked in size 10. In Anchor size 20, this motif is 3cms tall and 3.5cms wide.
2 shuttles wound continuously (ctm). (In my yellow trials I had worked with a single shuttle and ball, using SLT to keep shuttle in hand).

Techniques used: fs/bs tatting, dimpled ring, mock ring, lock join, CWJ & DYJ optional, roll tatting. All tutorials can be found here- https://tipsaroundthehome.blogspot.com/p/tatting-resources.html

Abbreviations: Sh = shuttle; -/p = picot; + = join; RW = reverse work; LJ = lock join; dnrw = do not reverse work; SS = switch shuttle; CWJ = Catherine Wheel Join (for frontside); DYJv = Dora Young Join variation (for backside); w = wraps )for roll tatting) 


    Start with Sh1 in hand.
    RingA: 3 - 5 - 5 - 5 + 5 - 5 - 3. RW (this is the central heart-shaped dimpled ring)
    ChainB: p 3 LJ 5 LJ 10. RW
    RingC: 6 + 2 - 6. dnrw. SS
    ChainD: 20 CWJ, 16 wraps, LJ 
    ChainE: p 3 LJ 5 LJ 10. RW
    RingF: 6 + 2 + 6. dnrw SS
    ChainG: 20 DYJv, 16 wraps, LJ 

    ChainH: 3 - 3 LJ. 
    Tie and cut and hide ends. 

💗💗💗
UPDATE (April 2021): NEEDLE NOTES by Pam Hemenway 

RA) 1) Paper clip to hold the ring and pull tight 2) Work to first join and pull off needle to make join.
CB) 1) Picots I picked up with needle point to use working thread would twist stitches.
CD) 1) Roll tatting = ds 16 wraps around the needle ds Hint- hold tight it is a bugger to take out and re-do.
💗💗💗

Some Ideas and Possibilities -
  • Add beads and findings and use as jewellery - pendant, earrings, brooch. Inverted, with beads and a braid/chain, it can work as tikka jewellery for brides!
  • Of course, applique on fabric or glue to paper. Motifs can be used anywhere! By the way, that chocolate (Lindt Lindor Milk Chocolate) is seriously one of the Best I've tasted. 
  • Arrange/sew motifs stacked vertically for bookmark. When joined in a row (with additional picots) we could get an edging or trim, or even a choker! 
  • In the above arrangement, it appears we'll need 5 motifs to complete the polygon. Hmmm, I see a possible 4-leaf clover leaf there, too!
  • And this is such an appealing Arabesque arrangement! Love the curves.
  • UPDATE: I forgot to upload this at the time. The 2 yellow hearts can be worked continuously by tatting the tiny hearts at the bottom as a split rings to climb out of one heart and climb into the next.

So, what will you be making?! Enjoy 💕

UPDATE: Check out His Kid (Sue's) wonderful adaptation of the heart into a mermaid tail, with part of the body as well - http://hiskid66.blogspot.com/2021/03/inspired-by-muskaan.html
UPDATE: Diane Howe adapted this into a Shamrock leaf! - post and pattern - https://tipsaroundthehome.blogspot.com/2021/03/lucky-hands.html

UPDATE: Aug 2022 - 
There are now so many adaptations of and from this heart - all are listed, with patterns, in the EP doc - https://docs.google.com/document/d/17LEVftXweztBIOWh4sL4BB7bX65ssoOsOn4oXIgCepY/view

Tuesday, 11 February 2020

cuori adorabili

Pin It now!
Don’t blame me if you see pinks and reds all around - ‘tis the season!
All hearts worked in Anchor Pearl cotton size 8.
The order in which I tatted them ....

The link to this heart pattern was shared on facebook. It is a 2009 Valentine’s Day heart by Polish blogger Alexander Dajczak.   
Ring spanned with a chain is one of my favourite motifs! And it is an easy way to get the threads across if you don't like split rings.
I worked with ball and shuttle and started with the top right of 5 center leaves and moved counterclockwise to return back to first ring.
I added a few graduated picots at the tip.
TIP : One addition I would make is to add a stabilising picot on the 10ds chains - 2 vsp 8.
It is 5 cms high, 6½ cms wide.

An event was organised in the Chiacchierino: Filo, Amore e Fantasia facebook group that had free heart patterns by 2 very talented ladies. They have another online meeting on the 14th, if you are interested.

Stefania Di Cesare shared 3 versions of All My Heart of which I made only the first to get an idea of the size. Eventually I’ll try another with bead in the center of the ring, and a beaded double picot. (16 mm picot.)
Another of my favourite effects is concentric rings or chains and this design had it in abundance! 
I went with some colour-play, BUT ….
TIP : ... I carried the core thread of previous round into the next. Delayed cutting and fewer ends to sew in. More importantly, no colour blip in the lock join since it was the same colour as the picot!
It is 3 cms high, a bit over 3 cms wide. 

Daniela Galli shared her heart titled the same as the event - Un cuore per San Valentino.
It is also supposed to be worked in one pass using a split ring to climb out. But I could see another heart in the central medallion, hence chose a spring theme palette.
I added a teardrop using my floating beads method.
I like the heart inside a heart!
It is 4½ cms high, 5 cms wide. 

It was great fun doing these quick little tats on the side. I like them all!!! The 2 Italian ones I did in the same evening.
I am still not taking up any large doily (though there are numerous beautiful ones floating about) in order to focus on other stuff, including writing up the snowflake patterns.

Many, many thanks to Daniela, Stefania, & Alexander 
for sharing their beautiful patterns

Friday, 7 February 2020

such sways and swaggers

Pin It now!

Oo, là là ! Such sways and swaggers! Such are the hearts here – all a-sway with built-in swagger!

So the green one is my 'official' version – much closer to my original sketch. It still needs stiffening if it is to be dangled. But now that I have the shape I want, I will experiment with some techniques and looks to keep the shape without the use of wire or stiffening.

Look what popped up as I worked around the center ! A possible paisley.

After round 1 - This time I thought of not adding an extra ring around the inner one. But on comparing after it was completed, and confirmed by hubby, I added that outer ring using scrap thread. This is why you see some pics with only 1 ring. Although hubby did say that it can be given as an option.
I like the look without any out round! 
Please note, that this round will need to be dampened and shaped before finalising it and proceeding to next round.

The green one, in Anchor size 20 (≡ Lizbeth size 10) measures 3”x2”.

All picots are very small. 
I think the ring on the left of the 14-14 ring should be 12-12 rather than 11-11 for a more natural gradient.
The rolls/wraps in the outer roll-tatted chains can be adjusted to suit your tatting tension.

With only the lone inner ring. As mentioned, the outer one was added later as additional decoration.
This motif can be worked continuously by climbing out with a 3ds split chain.
For detailed process, tips, and pattern notes - Round 1 ; Round 2 

Many thanks to those who played along! 
You can join the fun and tag me (facebook/instagram) , leave a comment, 
or send me pics of your versions!

Elisabetta de Napoli started a beautiful center in metallic [UPDATE- see complete heart here], 
and Sue worked in size 40. [UPDATE: treble tatting in 2nd round]
Margaret Davies used spiral/Josephine chains instead of roll tatting. 
And then there are Victorian sets that also provide visual texture.
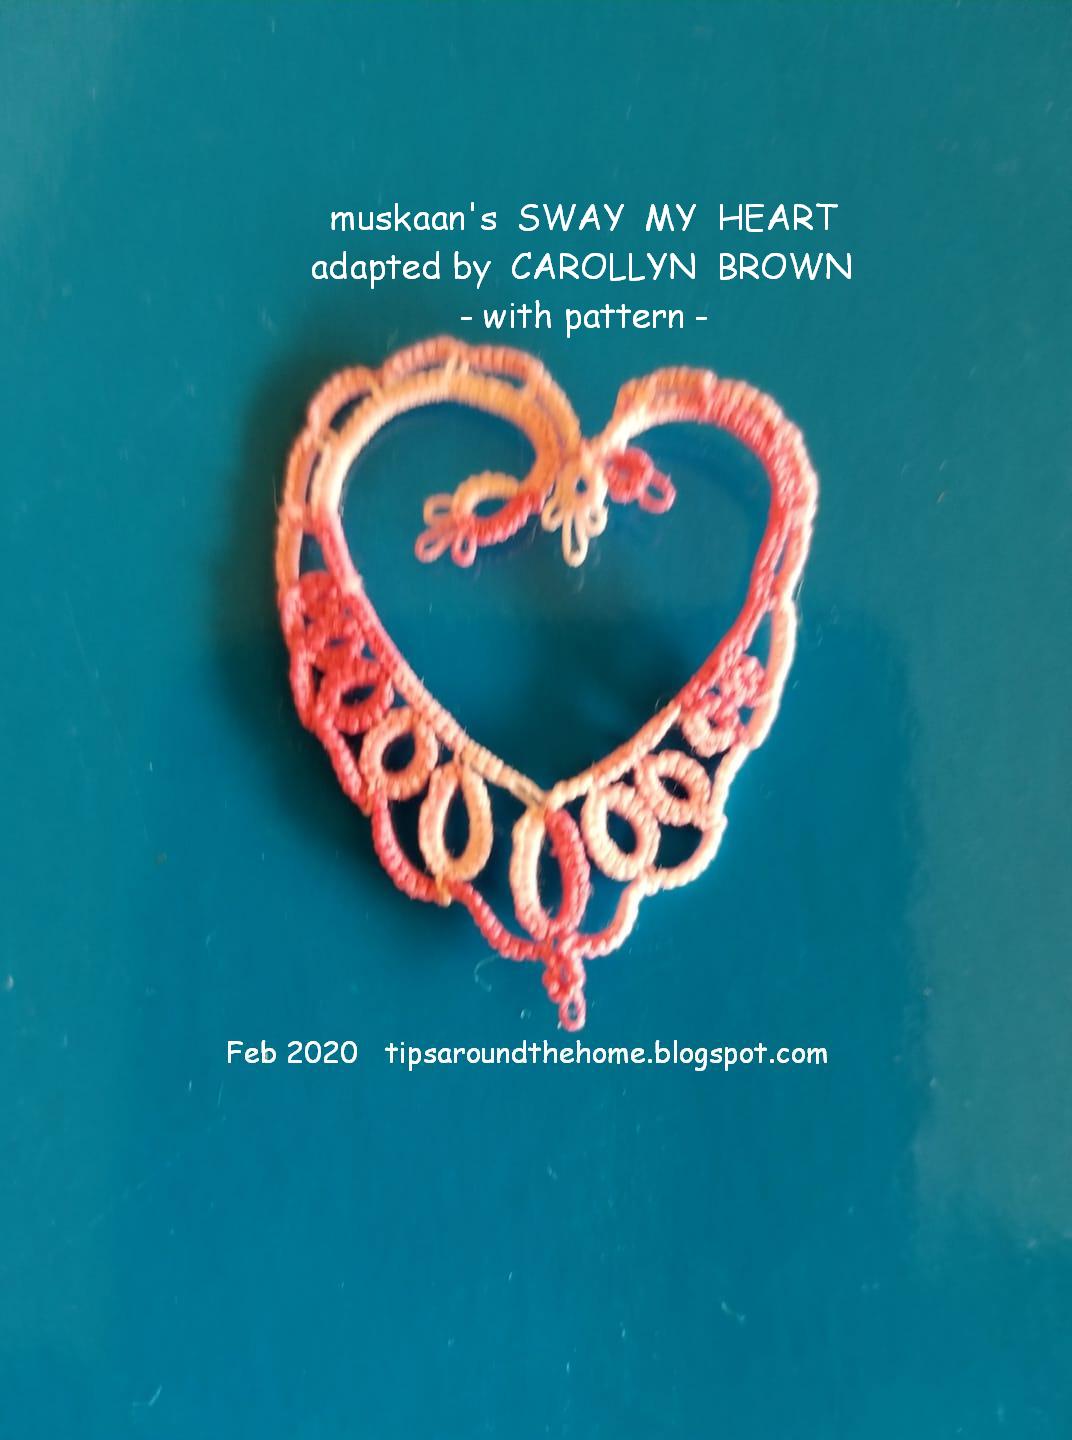
Carollyn Brown tweaked the pattern as you can see, and shared her count and notes. She seems to have straightened out the errant swagger ;-P In her own words ….
"Well I started at top and placed picots every six ds after the initial 2 rings and chain of 3 ds. This way I could go around twice. I had size 80 which was on shuttles and should have used larger thread but it was fun to make thanks can give more counts if needs be
Here are quick numbers I still used 4ds inbetween and I feel this could be tweak some more maybe less stitch count on out side outline.
 This last picture is the count for outer part no cutting threat till end."

Ninetta Caruso sent in her version – oh my it is already part paisley! And true to form, she has used s small curled ring (sCR) with bead, as well as treble tatting. She also linked adjacent thrown rings . The pattern in her words ....
"With one round only, mine should be sewn up somewhere to keep its shape. Otherwise it needed wire in the core, that would be something worth a try.
The inclination to left or right is just personal taste, in my version for example I would tat it again because at the end I like the other face up, but the sCR defines the front side.
I forget to tell you that I started from the bottom mock ring, then this and next rings are connected, that is the first is mock ring: 4-8-8-4, next is ring: 4-7-7-4, etc. decreasing the joint, till the last that is ring: 2-1-3.
I finished in the little heart at the bottom. "

UPDATE : 2 more decorated hearts !

As they say, 'it takes a village …' I love adaptations/derivations and also get to learn and improve my own work. So, unfortunately, this heart is still not ‘completely’ complete. There’s a lot of play left, right?! ;-D
Only after I am finally done with the ideas, I will release a proper pattern. But this should be enough for you to play along and to experiment.

happy tatting