Showing posts with label pds. Show all posts

Wednesday, 16 February 2022

a small gift

Pin It now!

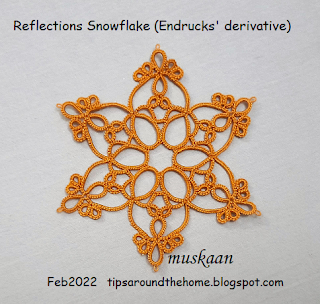
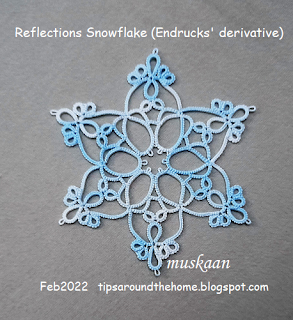
derived from Endrucks (1920) pattern #17

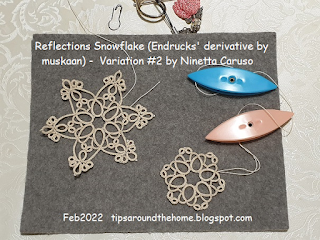
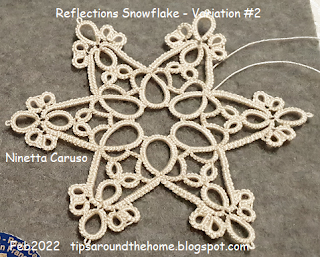
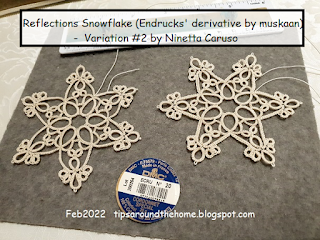
We’ve had such a wonderful group of tatters contributing to the Endrucks 1920 Project, and Ninetta and I wanted to show our appreciation in some material form. We finally decided on this snowflake. It is a direct derivative from one of Endrucks’ own patterns (#17) yet has quite a trendy modern appeal and application, and the prototype was very well received. It lacks Endrucks' denser block segments, though.
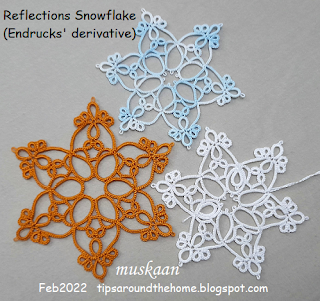
In December 2021, we gifted it to all our original volunteers who had worked on their respective patterns. Since then, many more tatters have joined our FB group and displayed their skills and shared patterns, too. This gift now goes out to all who participate and show a completed working/adaptation of any pattern from the modern pdfs or the original book.
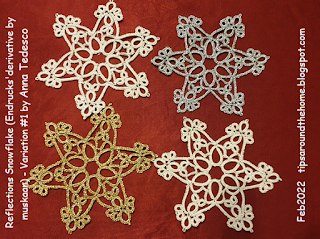
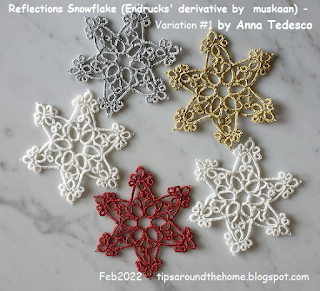
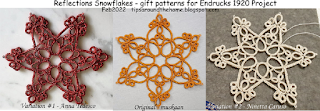
The finalization of this snowflake pattern is another reflection of joint effort. I wanted a test-tatter to try it in cordonnet cotton, but because it was to be a surprise gift, we couldn’t ask for volunteers. Ninetta finally suggested Anna Tedesco, who jumped right in with her characteristic enthusiasm and speed.
Using Sanbest 6 strands, she worked 5 complete samples, systematically sharing her feedback and even altering her style to improve on her previous samples till she was satisfied!
While the first round can be a standalone or tiled motif, with one arm of the 2nd round, it looks like an earring or pendant! She had to shorten a chain segment in the inner round, which might be due to the thickness/metallic nature of the thread or a longer inward picot.
These tips/links for inward-facing picots in both regular and direct tatting might come in handy-https://tipsaroundthehome.blogspot.com/2021/12/inward-picot-with-marker.html

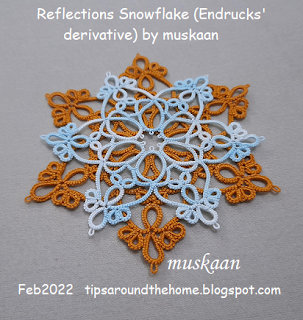
Ninetta, herself, got into the exercise, tatting 2 models, and we have a tweaked count for the inner rings and padded stitch (BDS) version for outer chains from her!
Notice the thicker chains on the arms. 
It is amazing that between the 3 of us, we had a total of 8 freshly tatted snowflakes within 5 days, including 2 variations! The power of the collective. This was in early November and the gift went out to all our original contributors in December. Now we are gifting it to anybody who completes a pattern and actively participates in our group.
As feedback poured in, I started a new model (mustard/gold in Anchor size 20) and much later I finished the earlier incomplete model in Lizbeth size 20, which is seen in the last photo here - https://tipsaroundthehome.blogspot.com/2021/10/spirited-seventeen.html

While I worked on presenting the pattern, Ninetta composed a beautiful letter of thanks. She also translated the entire pdf into Italian because the largest contingent of volunteers was from Italy (followed by the USA). Pattern is diagrammed as well as written. And the composite diagram shows all 3 versions/tweaks. I’m getting to like this style of diagram!

Not merely did I get such diligent testing, there were a few design lessons to be learned along the way! A very satisfying and happy experience.
Remember the newsletter I spoke about? Well, one tatter already completed that doily, joined our FB group and has started more patterns from the project. Yes, she, too, has received her gift.

There is one very exciting news to be shared in future about the past!

All patterns from the Endrucks collection can be accessed here (feel free to innovate and adapt) - https://docs.google.com/document/d/17LEVftXweztBIOWh4sL4BB7bX65ssoOsOn4oXIgCepY/view

Ciao for now and many many thanks to Anna and Ninetta and our Endrucks community

Friday, 31 July 2020

excitedly

Pin It now!
Day 2 of my Distraction continues.....7
As I said yesterday, I wound 2 shuttles, ctm,  with Anchor size 40, and started Robin's Challenge Snowflake.  Rounds 1 & 2 seen.
Then I deliberately left off and picked up the size 80 edging. 13 repeats done so far.
Both patterns can be found here - http://tattingbythebay.blogspot.com/p/free-patterns.html

Ruthie May is tatting along, working the snowflake in 6 stranded embroidery thread and using needle.


After 2 rounds, the snowflake measures 1.5". I like how the padded chains keep their shape. I think it's the first time I worked it in size 40. So much neater than size 20. (https://tipsaroundthehome.blogspot.com/2015/11/pds-padded-double-stitch.html)

I've used self-closing mock Josephine Rings in 2 of my patterns - I had called it SCM(J)R, not having come across it before. Love them!
https://tipsaroundthehome.blogspot.com/2016/06/under-pinning.html and
https://tipsaroundthehome.blogspot.com/2019/11/frost-flower-pictopattern.html

Followed the pattern exactly,  except for  this lock join in the end. I substituted it with Reverse Join because I want the red shuttle back in action in next round. (https://tipsaroundthehome.blogspot.com/2020/07/lock-join-plus.html)

Let's see what tomorrow brings. I'll have to get back to my usual (new) life routine, so.... What I do know is that I am having fun :-D

Friday, 21 December 2018

moth in a choir

Pin It now!

What's a moth doing in a choir of angels, you ask?! Tatting is full of surprises … read on.

We’ve all come across this beautiful angel by wiki on pinterest. Teresa recently made many and shared the pattern. One of my friends asked me about recreating the effect of the central joins which led me tat it up.
Dimensions : 5cms wide x 3½cms tall in size 20 Red Heart

It is a very clever pattern using basic techniques and a long picot for the halo (top right inset) The first ring has a longish picot, too, for linking later chains. The head is a mock ring – simple chain linked on either side with a lock join.

Not wishing to continue with this thick thread, yet not wanting to throw away the piece, I cut & tied, then whip stitched back to the ‘neck’ where I curled the head back from the front, and secured it. Then snipped off the long picot to look like antennae. Kind of cute, eh? So That’s how this angel became a moth.

I started over in white Anchor size 40 and the finished angel is 2½cms wide x 4cms tall. Unhappy with my block tatting!
Techniques : ring, chain, lock join, central picot, long picot, block tatting, decorative picots.
TIP : It can be worked with one shuttle and ball, ctm, and for block tatting I worked from the front only, by resorting to direct tatting.
Wiki has some really cute tatted doodles on her blog.
ßßßß
An angel needs company, so I started on Ruth Perry’s new angel pattern. 
Again, my tatting leaves much to be desired. The size of joining picots is important here.
In Anchor size 40, it is 2½ inches wide and tall.

The head uses padded double stitch (pds or BDS or DDS), and a long picot is twisted for halo. Split rings and chains with decorative picots are used to tat the wings and body in one go.
The skirt of simple rings and chains is worked and joined on the go.
I like the lacy fulsomeness of this pattern! 
Note: One 7ds segment for the wing center (SR) is missing in the instructions.


ßßßß

Two’s company, but three’s a choir! Loved the angel earrings Bernice shared here. It is such an elegant pattern by Sezione Hobbystica and can be found here.

In Anchor size 40, it measures approx. 4¼ cms x 4½ cms

I scrolled through her site and found a great drawing app for tatting !!! Played with it a bit on my tablet - fairly easy and straightforward. But it opens only in Chrome.

Many thanks to the designers for sharing their beautiful patterns

Related posts
ßßßß

Sunday, 17 September 2017

ties of friendship

Pin It now!
We ‘met’ in Georgia’s online class. Anita has been a huge supporter and her emails are always so sweet and encouraging! She is so talented – many will remember her corn harvest basket and her miniature tatted baby items.  

This year she was teaching a class at Tat Days and imagine my immense surprise and pleasure when I got the same pattern in my inbox almost as soon as the event ended! The pattern will be available on the Palmetto’s CD shortly. I am so touched by her thoughtfulness and generosity and treasure her friendship.

Doctor Who inspired
Red Bow Tie Tatted Necklace
Anita Barry

A 3D bow tie meant to be a necklace with jump rings and chain attached. I intended to sew it on to a hairband; instead a satin ribbon was passed through the bead to use for wrapping a gift. It's theirs to decide how to use the bow :-)

The triangular motif is repeated 4 times – 2 on either side of the bead, folded back on itself, to create this bow tie. Smart – and interesting how ‘easy’ it is to use flat motifs to create a 3D lace.

An alligator join midway through a ring was new to me - stopped me in my tracks! 
But it’s pretty simple – move the ring thread around/behind keeping the core/shuttle thread in front thus 'capturing' the picot and continue, making certain that thread still slides freely. 

Use of padding only one half of a stitch is clever (Half Double Double Stitch - HDD)! It adds stiffness to the tatting to hold shape, without making it bulky ! 
HDD is merely one form of a variable/unequal padded double stitch (pds).
According to the notation we proposed, 
a HDD would be pds(0,1) ie. regular first half stitch (0 or no wrap), 1 wrap on second half stitch. 
And if one wanted to make 10 such HDD, we would write it as 10pds(0,1).
pds encompasses all the various terms for padding the stitch.

Pattern called for a ½ inch bead. This pearl bead is the only one in my stash. However, one can use any sized bead, I realized only later. A smaller bead, more importantly with a smaller hole would keep the 2 sides from 'flopping'. Or perhaps I didn't snug the bead/tatting tightly enough. As a necklace, it wouldn't matter, though. 

I used size 20 Anchor although the pattern calls for a size 10 thread since I’ve come to realize that the former is pretty close to Lizbeth 10. My bow measures 2”x4” - almost similar to Anita’s. 

Since it is inspired by Dr Who, I went with maroon. Looking back, I really should’ve chosen a lighter colour to bring out the beautiful pattern. Pink, to go with the Barbie story book inside ? ;-P


Many many thanks, Anita :-)
I enjoyed tatting it tremendously & am sure the recipient will like & use it too.

Saturday, 17 December 2016

falling over

Pin It now!

tatted maple leaf

My very first balls of Lizbeth threads arrived after a 3 week wait !!! The first to tumble in was Falling Leaves in size 40. Well, a fall leaf just Had to be tatted. Here is the lovely ….

 Tammy Rodgers
a free pattern from Georgia Seitz's vast collection 


It was a pleasure to tat. But I did get confused about direction. I had started with ball & shuttle as mentioned in pattern. But I decided to tat the center trefoil in clockwise direction, and that resulted in the overall leaf being worked in counterclockwise direction, as seen in pic below !

Here's my working and notes....

1. Shoe lace trick or Two Shuttles ?
If working with single shuttle & ball, you need to do an overhand tie or SLT (shoe lace trick) for Ring D & also the last ring.
Rings D & U act like thrown rings, because of the change in chain direction to & from the ring, hence the need for a SLT or a second shuttle.
I try to avoid SLTs . Instead cut ample thread from ball & wound it CTM to Shuttle 2 at this stage.  

Please note that the SLT instruction is missing from an otherwise Excellent diagram.
There is also a bit of confusion about when not to reverse considering our more modern-day working. I would've explained just a bit differently, for tatters like me - I racked my brain trying to accomplish what was written. But it wouldn't work without a SLT or 2 shuttles.
This pattern was taught in the Beginner Class, but I haven't read the logs. This might have come up in the discussion. 

TIP : Brainwave ! Just struck me that I could've continued with ball & shuttle by working these 2 rings as Reverse Rings !!! Now that's a neat functional use for reverse rings. (more about RR in my next post. More synonyms & resources - scroll down to RINGS  - Thrown/floating rings).
ps : I tried it and it does work !  


2. Frontside/Backside Tatting :
If you prefer to tat rings frontside & chains backside (reverse order double stitch – RODS)), then make the first 3 rings RODS & adjacent chain frontside. From rings D through U, all can now be tatted frontside & chains RODS.
I forgot my own TWoT directions & ended up tatting All outer rings backside !


3. Stem
For a thicker stem I used padded double stitches or pds (2,2) for a decent length.

Should've blocked the leaf, coz I made a mistake in the first chain itself ! Only 15 stitches instead of 20 :-(

many thanks to Tammy and Georgia's Online Tatting Class 
for making this pattern available to us !

I have lots of fall leaf patterns in my collection to use this colorway. The thread works well. Took the plunge because Handy Hands is now listed in Amazon world & I can pay in Indian currency. But what a high price (with shipping & import duty) !!! For a total of 3 Lizbeth balls (not much choice in colours so far), I could’ve bought 43, yes forty three Anchor balls!!!

Ah well, what can you do if one has intentionally decided to fall :-D 

happy tatting always :-)

Monday, 29 February 2016

"17 years in the making"

Pin It now!

I sat down to tat a snowflake. Little did I know that hidden in a cocoon in the central flower, there was a butterfly waiting to spring out ! The snowflake was Georgia Seitz’ SuperBowl Sunday Snowflake 1999. 
When I shared my first pic in the Tatting Design Class, it was received enthusiastically & the pattern was cleverly dissected (no harm came to the butterfly :-) !). At the time I had named it after the snowflake (one of my ways of giving credit to the original) - quite a mouthful, though.

However, after talking to Georgia, it became Super 17 Butterfly for two reasons – it had taken 17 years for the snowflake to become a butterfly, & my date of birth is 17.
Recently I remembered two more important reasons ! This is the 17th year of her Online Tatting Class, And she celebrates her 17th birthday today – yes, forever young our GS !!!

This little butterfly is dedicated to Georgia Seitz 
& her immense contribution to the tatting art & community.
Happy Birthday, shuttle sister :-)
I am sharing 3 main versions of the butterfly – a simple 2D basic pattern & two 3D versions, with a few little options thrown in. All the butterflies can be tatted in one continuous pass.

THREADS USED & FINAL MEASUREMENTS
Yellow Butterflies : Anchor size 20 Art 4054 (0293 lemony yellow  & 0302 dark yellow)
Black Butterflies : 2 strands of Anchor variegated embroidery thread (1325), & Anchor Mercer size 40 black.
3D Peach Butterfly : 3 strands of Anchor variegated embroidery thread (1315) & Red Heart 0328)
In size 20, they measure 1¼”x1” & in size 40 1”x ¾”.

Super 17 Butterfly  
Basic Pattern
There are times when one is looking for a simple or beginner pattern. This 2-page pdf contains only the basic pattern in the form of written notations & diagram. It can be worked with single shuttle & ball & thread size of choice.


showing folded chain & inward picots
Options for antennae/feelers
in size 40 threads

Super 17 Butterflies 

                                      2D & 3D patterns 
This 5 page pdf contains both the basic pattern with diagram, as well as two 3D versions with some process pictures.

If, while tatting, one decides to convert the basic 2D butterfly into a 3D version, simply follow along without cutting & tying! The 2nd wing is winged after completion of body with one minor change. And one can still work with single shuttle & ball.
In this version, the basic 2D pattern is followed till the end where instead of 1ds, a Mock Ring (or SCMR or chain joined back on itself) of 2ds is made. Continue without reversing work. The 2nd wing is worked from behind/back side of the previous wing and is a mirror image of the 1st wing. The wing is joined back at the base of the head to complete a 3D butterfly.


I got the feeling while photographing, that the head got hidden in the 1st version. My very first visualization had been to make the body 3D by coiling a chain around, as I had once done back in 2014 for a freeform pond reed (see pic). But that will have to wait for another butterfly.

Instead I added texture & bulk to the body by using a combination of variable padded ds & Josephine chain. To make the head more prominent I applied my perpendicular arrangement of concentric/onion JosephineRings.

So here’s version 2 of the 3D butterfly for those who like a bit of a challenge.
This version requires 2 shuttles. 

The antennae/feelers were kept simple with a long picot snipped in half later.
The peach thread is perle cotton which was a mistake! It appears bulky but loose & the stitches are never as neat as one wants them. Nevertheless, in order to show the head & torso, I had chosen a lighter shade .


I hope nothing has been left out. In case of any questions, mistakes, etc. feel free to talk to me. You know where to reach me :-))) 
happy tatting :-)

Related Posts/Tutorials : twisted picots (floating)

Motif #24 of III for 25 Motif Challenge


Monday, 7 December 2015

Thorny Wreath pattern

Pin It now!
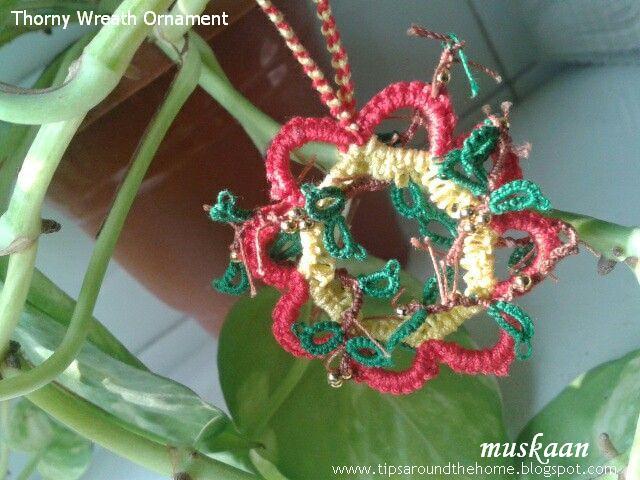
Wreath Ornament 
(Reworked, Revised, & Updated)

It’s that time of the year, & there has been some activity on this pattern for a few weeks now. I wasn’t too happy with colours & working when I first made it. So, it was time to rework the pattern, as well as create a proper pdf, with diagram, to download.

This time I used more Christmasy colours & added a sprinkling of beads.
Being fairly small at 4½ cms diameter, it can be used as a tree ornament, a decoration/adornment for gifts, sewn on to a headband, or be used as a pendant, a brooch, or earrings ; embellishments & colours can be customized.

(click to download pdf with diagram)
This is a 2-round tiny motif where the base 1st round, made of split rings, forms a large flower, and the 2nd round is freeform, interweaving a chain through the center of the flower medallion. The freeform weaving lends a 3D interlaced effect to the 2D flower wreath & makes each ornament unique.

Round 1 is made of 8 split rings, in 2 colours, size 20 thread, and uses padded double stitch, ending in a Lock Chain loop for hanging.
8 SRs are needed to get a central space large enough for normal shuttles to pass through when interlacing Rnd 2.
TIP : Padding the stitch (pds) can cause some twisting of thread. Suspend shuttle to remove twists.
VARIATIONS : Only 6 petals make a beautiful flower medallion with a flurry yellow in centre & red petals around. Add large cabochon, pearl or gemstone for jewellery piece.

Unlike the earlier attempt, this time I used size 40 thread for the freeform round. Beads were also added to represent berries. 
Load more beads in both shuttles than strictly required so that one has plenty to play around with.

Bring forth beads, tat folded rings leaves, & add the thorns using scrap thread. Instead of making long picots & snipping them, this time I used my spot addition of Corina's fringe.
            TIP : The thorns can be frayed for a different look.
                                                           
The 2 versions together. 

I guess I could've made the vine less dense. ...
One can use just the freeform vine pattern for a bracelet in customized colours/embellishments. ! It is, after all, the freeform that makes each piece unique & exclusive. No two will be the same !

For complete pattern download : Thorny Wreath   
I'm sorry for the blank 4th page - tried my best but it just won't go :-((


Some Techniques used (click for link to tut) : 
Padded Double Stitch (pds)
Martha Ess' Folded Rings
Corina's Fringe  This can be used if one is not using beads . Instead of beads, preload the fringe thorns.
My spot adaptation of Corina's Fringe

Happy Tatting 


Related Posts : Wreath Ornament

Motif # 13/III for 25 Motif Challenge