Showing posts with label lavender. Show all posts

Thursday, 29 June 2023

gifts galore 1

Pin It now!

 A few months back I received a bonanza of beauties from my tatting buddy, Anita Barry! She had been wanting to send me gifts for years and I kept declining. Then she got hold of my address and there you have it - unstoppable Anita 💖

The big haul!
This photo gives an idea about the relative size of the items.

Beautifully tatted motif in the key chain. Passed it on to hubby.

Her handmade pin cushions. There had to be lavender and the fragrance is heavenly!

The same pin cushions from the other side!

Lizbeth size 20 threads and a lot of shuttles. I was thrilled that they were all bobbin shuttles with a hook - the only kind that my hands seem to like, LOL

Her hand-painted shuttles straight from the beaches of Florida!

and the same on the other side.
These shuttles are a bit smaller and 'thinner' than the Pony shuttles I use. 
They are more dainty to hold and work with.

Ooo, such a charming pendant! Already strung on one of my chains.

Okay that flamingo scissors is quite the eye-catcher! 
Hand-painted rock/pebble; tatted medallion in size 10; and hand sewn needle case.

The needle book up close - look at all the tiny details!
 
No amount of trying could capture the tiny handmade lavender flowers on camera. 
One has to admire them in person!

And the inside of the book with special (easy threading) 
needles and pins.

I have frequently seen these scrap containers in blogs (notice the scraps she sent me, LOL?!) and used to think - well they take up too much space, not for me.
Realized only now that they collapse and lie flat!!! 
It is being much used already.

A vintage lace that she suggested I could use as a bookmark, which is exactly what I am doing.
The skein of silk thread is Really very special! It belonged to her mother. I have still not decided how to use it to do full justice to the gesture. In my earlier eyesight I would've started an embroidery project immediately.
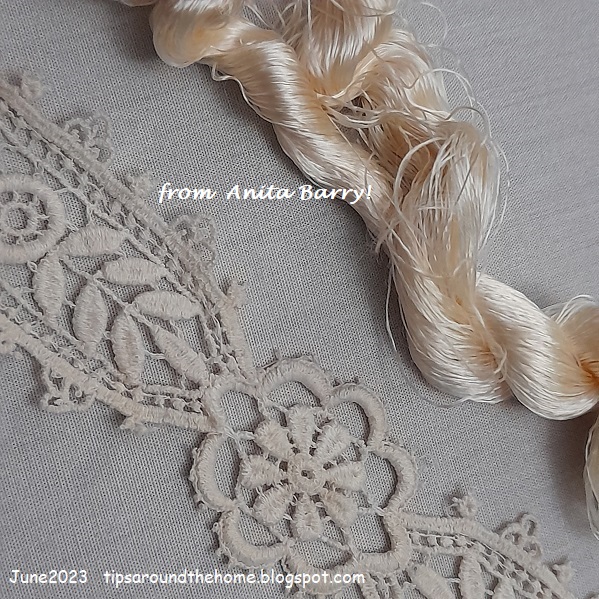
Detail of the lace and thread.

The gifts came at a time when I was very ill and I couldn't use and enjoy them properly or fully. It took a while to even take photos. However, if you notice the lead pic, you'll see some books peeking out. They require a post all to themselves! So please come back tomorrow to celebrate my good fortune and treasure!

Saturday, 25 July 2020

applying techniques rakhi

Pin It now!
It's that time of the year again - Rakshabandhan is round the corner and Indian tatters are already posting lovely tatted rakhis. Here's my rakhi for 2020 ... AppliTech rakhi/bracelet!

The portmanteau 'AppliTech' refers to the fact that it is kind of a test or trial or experimental piece for applying a few techniques. It started as an observation piece for the Lock Join Plus methods as posted here - https://tipsaroundthehome.blogspot.com/2020/07/lock-join-plus.html where lock join, reposition threads, SLT, and reverse join (and switch shuttle) were all used in batches, resulting in randomly placed colours on one side.

Then, in response to a question on facebook, I re-demonstrated what I had discovered last year - whether you hold the gauge above the core thread or below it (as in Ninetta's Tuft picot), provided it goes through the leg of half stitch, the final result is the Same!

All tutorial links here, including my study of picots (Interlocking, Mrs Mee, Tuft} - https://tipsaroundthehome.blogspot.com/p/tatting-resources.html
I will share my detailed comparison in next post, along with more observations.

I continued on to make the 3rd Josephine Ring placing the gauge above core thread.
Each ring starts and ends with 1ds, and has a picot after every half-stitch.
Each JR is made of 20 1st half-stitches with a 5mm gauge.

Many of us have already come across this beautiful Lavender sprig by tatting_art on pinterest or Instagram and she has uploaded a how-to video here (thanks for sharing the link, Karen Cabrera).

Next, I started mock rings with treble tat stitch. I started each chain with an Intruding picot which served as the starting picot for first tds, also to join back the chain into a mock ring!

Why mock rings, you ask?! Because I did not know how big the ring should be, what the count should be.  With mock rings,  I had the freedom to keep 'bending the curve' to gauge the chain length.  Hence, no tds count. 

Close-up of the dimensional/stacked flower. Bead was added before starting the last mock ring, by pulling up a loop...
Continued with the Priscilla edging (Fig 29 from her Tatting Book 3), though this time I followed a symmetry in colour placement. Lock Join and Reverse Join are used in alternating chains to move up to the next chain. By direct tatting (unflipped/reverse stitches) every alternate chain, I could tat all from the front. No RW or turn work!
Added findings after it reached 7" length. Anchor Pearl Cotton size 8.

Perhaps with a bit more effort, I could work the 2nd part of the edging to face opposite, rather than appear continuous. But there are a lot more things on my over-full plate ;-P
See you soon ....

Oh, but before I go, Sue Fuller taught my 2017 rakhi (in March) and Bonds of Love rakhi/bracelet (in April? she liked the blue, red, white version) in the Online Tatting Class earlier this year. I didn't get a hold of the logs, though, so have no idea what transpired in the class ;-D

Friday, 17 April 2020

springing flowers

Pin It now!
...and surprise emails… Stay at home orders have truly unleashed the learning and creative founts of tatters! Emails asking for help have increased, too. One such was a request to test a 2-colour re-writing of Julie Patterson’s Spring Flowers bookmark in order to help out a friend.  
Got on it right away and experimented with a few little spring flowery effects. 
Though not mentioned in the original pattern, it is best worked with 2 shuttles.

Mogra Gajra (garland)
In order to get a feel of the pattern, I worked it in single colour, 2 shuttles. This is the easiest to accomplish and simply by switching shuttles, one can keep all elements flat and in position.

TWoT Notes : This pattern moves en bloc like Mary Konior’s glass mat or Sushma's bookmark. I’ve come across a few such patterns where shuttle 1 is the main shuttle for a block of work and then shuttle 2 takes over for the next block and so on. This is especially evident in frontside/backside tatting. 

My next red and brown version is the flame of the forest (Butea monosperma or palash) tree in full bloom! One of my favourite flowers to draw in ink.
In order to get the colours in position, shoe lace trick (SLT) had to be used. I am not a fan of this and later tried many little tweaks, including capturing the brown thread in the single red ring to avoid SLT. Nothing worked to my satisfaction since the twig does not remain in the same plane as the flower. It tends to start beneath the 4-ring cluster.
I ended the twig with padded double stitches, getting a straight, thick branch.

My final version is clearly lavender! Love the colours here. 
In this case, I used an unflipped half stitch in place of the SLT. Unlike regular reverse stitches, it is manoeuvred in such a way that the half stitch faces in same direction as the ensuing chain. Images 3A to 3C give an idea of what I did - twist work in reverse stitch. The shuttles switch position!
I like this method best for 2 colours as you can see that every element lies flat in the same plane.
UPDATE: one page pictorial for Twist Workhttps://drive.google.com/file/d/1To6YwZSkh2ffQH3XBcKZ-Ed3l4myW34c/view

To compare front and back views of all three -

view from the back
All 3 are worked in Anchor Pearl Cotton size 8 and are 1” wide. Length depended on the thread left on shuttles. Due to this narrow length, I'm going to use these as tails in a future bookmark(s), hence left the tail threads uncut.

I love the pattern – the clean lines and turns – it is exciting to work. However it is floppy (the SLT one is floppier than the others) unless sewed down. So stiffening will be needed or inserting it into a sleeve. Or one can add a joining picot to the 3rd ring and link the chain to it.
Beads can add colour and sparkle, and decorative picots can change the look of the flowers. Something to try in future.

Many thanks to Julie for sharing her pattern and 
Jill for throwing the opportunity my way :-)