
Remember when I posted the E37 flower flake and star and was not very happy with my wide picot? I couldn't always get the stitches under/within the picot to stay consistent and neat. So, I explored some more which I should've done at the beginning, having the links in my Tatting Resources page already! Well, my oversight gave me a chance to study it better.
Download my pdf of Wide Picot Pictorial here - https://drive.google.com/file/d/1Ejb7tVOk15VQHV0omhUt-HIb1CzYAI7I/view
All tuts I referred to had the wide picot on a ring. This means there is the ring loop besides the loop(s) for the picot, etc. Unnecessary confusion. I decided to do the steps on a chain where I could employ two colours.

In all tuts, the wide picot is encapsulated only in the 1st half-stitch while the 2nd half-stitch is worked normally.
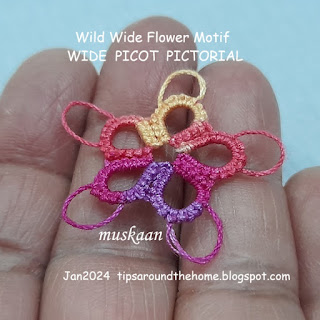 This is a little rosette I made using the wide picot and am fairly happy. Lizbeth size 20 used.
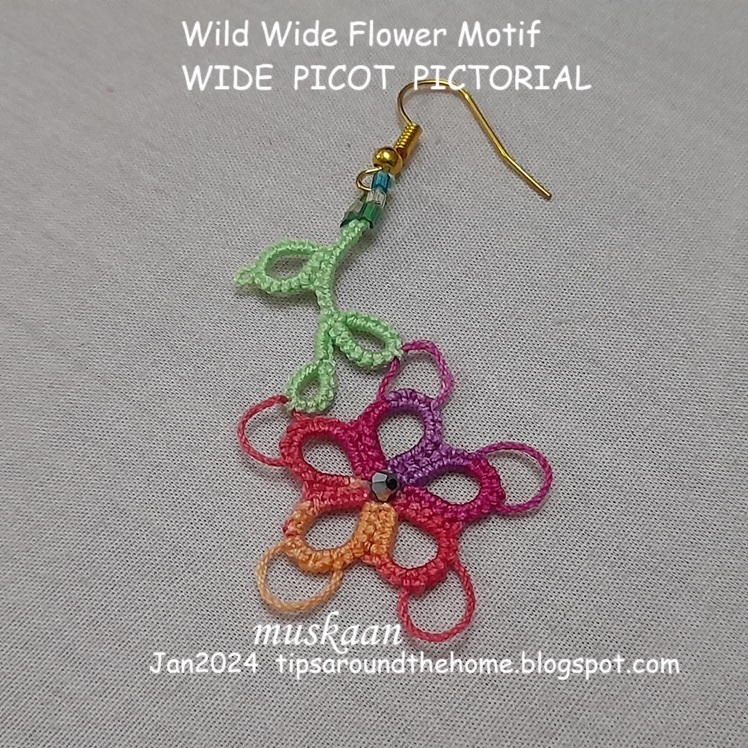
 Added leaves and stem in order to show that the picot in not merely decorative, but functional as well.
 Added beads and findings for an earring.
 One can add pre-strung beads on the wide picot, too, but I don't see the point. I would much rather make a double picot, loading beads at the time of joining.
 When I showed Ninetta Caruso my pictorial, she shared her own method which involves simply twisting the loop for 1st half-stitch once before inserting the shuttle and snugging. She even made a video to demonstrate it - https://drive.google.com/file/d/1XsqlFZHcVpopvRFBhTgR6_oQWqf98Bw7/view


The oldest tutorial I found was by Dan Rausch (tatmeister, 2003) - http://pages.suddenlink.net/tatmeister/widepicot.html? However I found it difficult to follow his written instructions, oops.
Now this was a technique that Georgia loved to ask every new batch in her online classes.
Shannon (mytattingplace, 2011) had uploaded a video based on her understanding of Dan's technique and it is so clear to follow - https://www.youtube.com/watch?v=qONlAylfXIQ
In this method (above pic), one needs to hold the loop on the left hand and make the 1st hs on this loop.

One can make smaller picots inside the wide picot, too. A floating Josephine ring would look good too! See Claudia's pictorial linked below.


TIP: After making the number of stitches encapsulating/within the wide picot, it is good practice to tug on the picot to remove any slack.

For the E37 flake I had used Karen Cabrera's Lesson #34 video (kcabrera74, 2011) which is the easiest to perform - http://www.youtube.com/watch?v=IaT-Pktx9nw . It is like making a normal join!
And just to complete the list, there are 2 pictorials by Claudia Meza (2010) in Spanish - https://howtotat.blogspot.com/2010/04/wide-picot-picot-ancho.html and https://howtotat.blogspot.com/2010/04/lochness-monster-picot.html?
So, each method is good. It is up to the tatter to practice and work them properly.
Ninetta has used the wide picot, aka Monster picot, quite often, including with treble tatting - https://ninettacaruso.blogspot.com/2018/09/a-wide-choice.html. Her Falbalà doily is a marvelous play with wide picots - https://ninettacaruso.blogspot.com/search/label/falbal%C3%A0 .

This time again, I am using the Wild Wide Flower earring as my entry for both Natalie Rogers' PICOT bingo (the Tat Earrings box which makes 3 boxes in a column) and splocik's Small Decorations.

Check out what others sent in as small decorations for Jan 2024 here- https://splocik2.blogspot.com/2024/02/male-dekoracje-2-galeria-styczniowa.html .
I haven't really played with the wide picot, satisfying myself with a very basic motif. Hopefully some day ....
Many thanks to all for sharing their knowledge, skills, and ideas so people like me can widen our own repertoire!

