(all links at the end
of this post)
Yes, “Picotgate”
is what they’re calling the Ikuta Picots (Method 3) in class now, LOL!
Why? Probably
because some tatters are still struggling to crack the effect – those picots
seem to be in quite a conspiratorial underhanded deal against us :-)
So, here’s
another post on the same topic. I don’t know the specific difficulties faced by
tatters, but Deep Throat has learned a bit more since the first information was provided in the pictorial & the post, and is revealing it in a slightly different style –
a tat-along exercise for the Woodwards & Bernsteins :-). Hopefully, some
associations & connections might emerge from this little exercise in “doing
is learning” .
We shall approach the picot effects through the chain route, going from simple to
complex, so that beginners may take a shot at it too. I have taken all new photographs for a new perspective.
IKUTA’S PICOT EFFECTS ON CHAINS
A tat-along exercise
A tat-along exercise
For this
tat-along exercise, we need only 1 shuttle, and 2 scrap threads, preferably in
different colours.
In my samples, red is the core/shuttle thread & blue
& yellow are the ‘chain’ or scrap threads.
To start
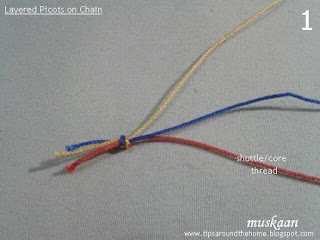
each part, I tied the 3 threads together & tatted a 3DS blue chain.
I. Layered Picots-1
Knot the 3
threads together & make 3 DS with blue thread.
After the chain segment is tatted, simply leave/drop the thread to the left.
3DS with
yellow thread, leaving picot space at beginning.
I have only just noticed that 1 half stitch of yellow segment is missing – an inadvertent mistake; please ignore.
Continue
these segments. Notice how the yellow thread remains behind ....
... and the blue thread remains in front.
Notice the
placement/layering of picots : each picot is separate, but one colour lies in
front & the other behind throughout the chain. Also notice that the core
thread remains the same throughout.
We can switch the colours if so desired (Part II of the exercise is optional) ...
II. Layered
Picots-2
Follow the same procedure as in I. But this time, keep the blue thread behind, to the left, after completing 3DS.
Compare with
pics 7 & 8 with 4 & 5 above.
The final
result is same as above, except that now the yellow picots lie in front &
blue behind.
Pic 10
shows both the above effects together for easy comparison.
This style
of layered picots was incidental ; not part of Ikuta’s Picots. But it helped me
figure out how to overlap the picots to recreate Method 3.
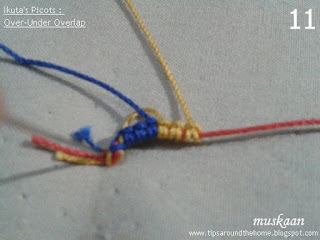
The 2 ways of overlapping are as follows - over-under overlap & under-over overlap , giving a sense of intertwined picots.
III. Over-Under
Picots (Method 3)
In this
overlap, the picot lies Over the arch of previous picot, but Under the arch of
next picot. See inset in pic 15
Tie the 3
threads together & tat 3DS with blue , picot, 3DS yellow.
Bring blue
Behind yellow , leave picot space ...
& tat 3DS .
Repeat the
same with yellow : bring yellow from Behind blue, leave picot space, & tat 3DS.
Continue in
similar fashion for required length. (pic 15)
Examine
how the picots lie in relation to each other. They have an over-under overlap as explained earlier.
Now let's do the other overlap ...
IV. Under-Over
Picots (Method 3)
As the name suggests, the left side of picot lies Under the previous picot & right end lies Over/above the next picot.
Make 3DS
with blue ;
Bring
yellow in front of the blue thread, leave picot space & tat 3DS.
Bring blue
in front of yellow, leave picot space & tat 3DS
Repeat to
required length.
Examine how
the picots lie in relation to each other. The woven appearance has an
under-over overlap.
The two overlaps shown together for easy comparison.
To refresh our memory & compare , all 4 chains are photographed together.
Have you
completed this exercise successfully ? Do the happy dance :-D
Do you feel confident of making the
picots on a ring ? If yes, then we will continue our exercise on rings in the next post, along with a bit of conceptual input.
Before I sign out, here's something to ponder over :
IS THIS PEARL
TATTING ?
Can you give reason(s) for your answer ?
In case of Any difficulty or doubt please feel free to leave a comment or email me. Your input & feedback is also very valuable. I hope to get some answers to this question before I post the next part :-)
happy tatting :-)
(to be continued)
Related Links & Resources
class material & logs for May 9, & May 16, 2016 (many thanks to Georgia Seitz)


This is fun to see love the laying it over other colors if I recall right it reminds me of a free pattern that Marilee Rockley had for a snowflake it is a pattern for practice anyway it was so long ago I think it was rings and would have gone better with last post. Love this chain demo great imagination.
ReplyDeleteI would say no this is not pearl tatting cause your just making picots :) but close three shuttles, I think of bare threads for pearl tatting
Is it the Melt into Spring Snowflake, Carollyn ? I tatted it immediately but still haven't blogged about it :-( She uses Daisy Picots in that one (this was a major area of confusion in class, with respect to these 2 types of picots)
DeleteThanks for your thoughts on Pearl Tatting ... will tell all in next post ;-)
Sorry I took so long to get back to you, yes it is. Can't wait to here the big out come
DeleteSorry I took so long to get back to you, yes it is. Can't wait to here the big out come
DeleteWell, I can definitely use more practice so I'll come back and follow your tat-along carefully. It's almost 11 pm here at the moment and I need to be in bed. Thanks so much for posting it. Georgia mentioned last night that we will be revisiting the Ikuta picots in class again, too.
ReplyDeleteIt was when Georgia mentioned the continued confusion, that I offered to revisit this tutorial & she readily agreed. I had been helping a couple of fellow tatters tackle the picots, so it helped me frame the tutorial in this stepwise fashion.
DeleteYour sample was superb, Eliz !
You've put a lot of work into this. I haven't tackled this technique, but when I do, I'll be glad of your tutorials.
ReplyDeleteJane, I believe this was the fastest tutorial I put together - all in one day (and through the night to almost 4am ;-P)
DeleteHaha! You gave me my morning chuckle with your into! When I get around to trying this technique, I will definitely refer to your tutorial!
ReplyDelete:-D (((hugs, Diane)))
DeleteI will have to check this out better later! :)
ReplyDeleteAnytime, Sue :-)
DeleteYour explanation is great! I think my brain has finally figured it all out! Now to get the hands to work the thread appropriately! Right now it's beautiful weather so I'm off to play in the garden.....
ReplyDeleteThanks, Mel. This has been a learning & evolving experience for me - the more we 'teach' the more we learn :-)
DeleteHope you had a good spin in the garden :-))))
Is it perle tatting? Whether you define perle tatting as a method of tatting or a particular look, one of its characteristics is bumps (or picots) on either side of the core thread. So I would say no.
ReplyDeleteValid points, Eliz. But what about the 3rd thread ? Is that an essential condition or not?
Delete