Time passes swiftly!
The third post in the Mock Ring
series …
Before I begin, there are a few
resources and examples that I have been collecting, some of which could have
been included in the previous segments (under-over join). eg. Frivolé used the U-O join to great effect in the Victorian Trellis Doily here. (This doily, as well as many broad collars with mock rings, is from The Priscilla Tatting Book, 1915). And Eliz’s exploration here.
These, and more, will be listed at
the very end of the Mock Ring series.
Lock or shuttle join is a more
frequently used join to make mock rings. Many different variations are
described in segment 2.
Mock Rings 2 : Lock
Join
For ages a lock join has been used to create a mock ring out of a chain. Many antique patterns are
testament to this. Even today, lock join is more common than the under-over join as far as mock rings are concerned. Variations arise depending on where the join is made.
Lock Join to earlier picot(s)
A chain can be tied down at both
ends, through a picot on an earlier row/element to create a loop resembling a ring. It may
be through a single picot or two closely placed picots.
To distinguish separate rows, Row1 here is tatted
in cream (shuttle & ball thread continuous).
A 2nd row is worked over this, using the small picots to make mock rings.
A 2nd row is worked over this, using the small picots to make mock rings.
For Row2 shuttle contains cream
thread joined to a ball of variegated thread for clear distinction.
2A. Lock Join: to same picot
A chain is linked to a previous
picot to start a mock ring, and again to the same picot at the end of the ring. Thus the mock ring starts and ends at the same point.
When the picot on a previous row
is reached, the chain is lock joined to it.
Pull a loop up through the picot and pass shuttle through this loop. Then tension the loop.
Continue tatting the chain for desired length;
pull up a loop through same picot to make another lock join...
A mock ring is formed.
2
such mock rings separated and flanked by chains are made.
In 2nd mock ring,
instead of pulling a loop up, the loop is pulled down through picot and shuttle
passed for the lock join. This creates a tinier footprint as is visible when
the 2 mock rings are compared.
2B. Lock Join: to separate picots
Picots may be placed close together on the previous row (the ring in Row1). Mock ring is formed by making a lock join each in separate picots, 1 or more stitches away. This gives a slightly open ring since the ring starts and ends at different points.
After anchoring the chain to one picot with lock join,
continue chain and lock join to another picot.
Go around the ring joining to alternate picots.
Antique
patterns often cite these as mock or false rings, though modern notations simply
instruct us to make chains.
There
are more variations in this category. Perhaps you can guess which?
…. to be continued


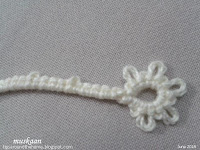
Useful info, thanks. Mock rings can be a useful design element, must remember. I hope you can use this little flower for the saree project.
ReplyDeleteI was going to share the pattern for this flower and then deleted it, Jane - TMI ;-P
DeleteI've already done something similar for one of her sarees earlier, using up different scrap colours in center and black outlines. Wonder if I have any motif left over ...
Interesting post, and very well explained
ReplyDeleteI too love your flower design.
Then I'll write out the stitchcount and post, Margaret :-)
DeleteI can't really call the petals rings, due to the distance between the start and the end. Semi-circles maybe? I can't wait for the third post about this, I can't think of other styles of mock rings.
ReplyDeleteIf the picots are adjacent, the space decreases, Lavi, but I totally understand. I chose this example from a similar one in Nicholls' book.
DeleteSo be ready for some 'hey, I knew that' reaction in the next post ;-P
very nice explanation, sometimes a little trick I do is, I make a joining picot on both sides of a chain by tatting onehalf of the ds couple times and then a picot and then ds as normal if I want the picot to face inward. Hopefully this made since.
ReplyDeleteMakes perfect sense, Carollyn :-) You make a 'folded chain'. It is on my list, but not in the next post !
DeleteWell I tried so it will be a surprise 😃
ReplyDeleteBeautiful flower and very intersting post :)
ReplyDelete